At this point, we’re half way through a major improvement to the block we’ve been working on. We have the ability to edit the content in the editor but we aren’t able to save it and because we aren’t able to save it, we aren’t able to view it on the frontend.
Now, though, we’re at a place where we can save our data, render it on the frontend, and continue to make sure that what the author sees is what the visitors see.
As I’ve done with the rest of the series, I recommend reading these first parts because they are going to bring you up to speed on everything you need to do to get up to this point:
- Required Tools, Plugin Structure, Dependencies, Block Metadata
- The Backend, The Frontend, Functionality, Styles, a Working Demo
- Block Attributes, Editable Content, Components, Editor Styles
Note that I still don’t have a GitHub repository set up for this plugin. I will once we reach a certain point, but not yet. And that’s because I think reading through the material and having to implement it versus cloning and changing a few things around can help you learn some of this material faster.
Anyway, I ended the previous post stating:
We’re going to cover
- how to save the content,
- render it on the frontend
And that will wrap up this initial part.
So that’s what we’re going to do.
Block Editor Blocks: Saving Content
By this point, you should be well-versed in both my opinions of the purpose for the edit and save methods. In the previous post, we focused on the former. In this post, we’re going to focus on the latter.
But before doing that, there’s a couple of concepts that are key to understanding before simply implementing the functionality of the save function.
💾 Saving Data
Recall from earlier in the series that our save function currently looks like this:
save: () => {
    const blockProps = useBlockProps.save();
    return (
        <div {...blockProps}>
            This is content from the frontend.
        </div>
    );
}
And all this does is simply write out the block attributes to the div container to the frontend, and it renders the specified string within the block. But as of the last post, we’re now able to edit the content of the block. So what we want to do now is not only serialize the information but render it, too. And though the save function makes both of those possible, let’s first start with simply saving the information.
To do this, we’re going to need to pass the attributes to the save function so that we can access them within the function. Remember the attributes we defined in the previous post look like this:
attributes: {
    content: {
        type: 'string',
        source: 'text',
        selector: 'input'
    },
}
And so the save function signature should now look like this:
save: ({ attributes }) => {
    // TODO...
}
Note from the JSON data above, we have a content property. So let’s first start by replacing the string of content in the save function with attributes.content and see what happens. The code should look like this:
save: ({ attributes }) => {
    const blockProps = useBlockProps.save();
    return (
        <div {...blockProps}>
            {attributes.content}
        </div>
    );
}
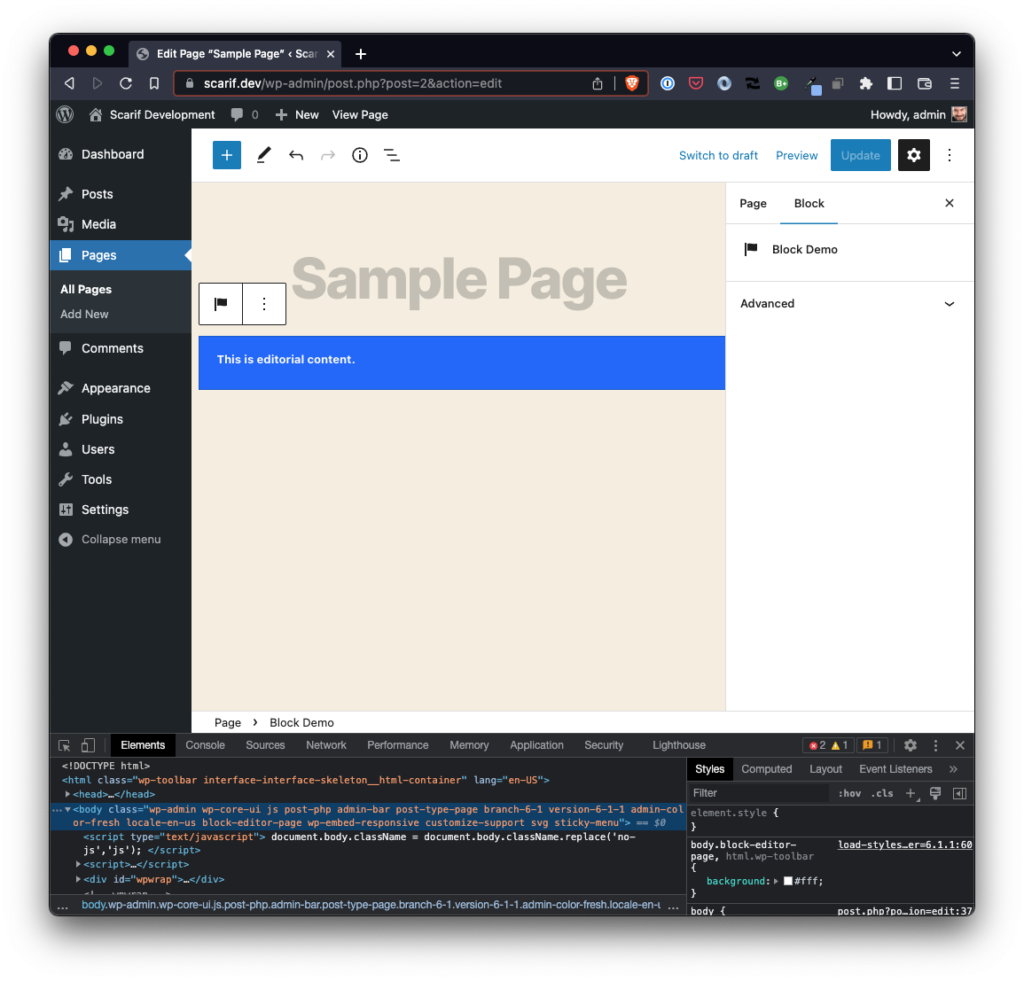
Run npm run build in the root of your project and then refresh the editor that has your block. You’ll probably see a message about how you’ll need to Attempt Block Recovery and this is simply because we’ve rebuilt the assets. Click the button and then the block should appear exactly as it did when we left off.
Now go ahead and type some content into the block. Click Save Draft and then click on Preview in a new tab. This will open the window in, y’know, a new tab and you should see see the content you’ve typed (though it may not be styled the same way – that’s coming later).
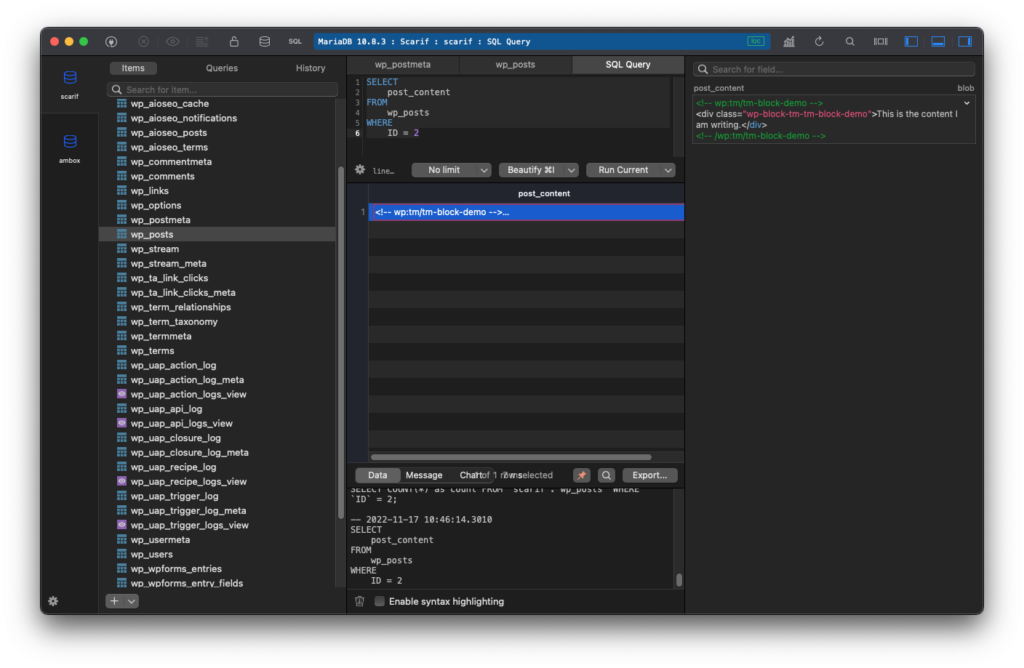
Notice the data has saved. Easy, right? We can take this a step further by looking at the database to see what was actually written.
- Open your database front-end
- Navigate to the
poststable - Then run a query against, say, the post ID or the post title where you can review the content.
What you should see is the post data along with the text written in the custom block we’ve been working on:
And this is where WordPress has all of the built-in functionality for saving the content to the database.
🎨 Style the Frontend
Now what we need to do is make sure the frontend looks like the backend which is somewhat inconvenient because changing the backend is what is causing us to do this (recall from the previous post the reason we had to modify the styles is because of the TextControl).
In short, we need to change the font-family, the font-size, and the padding. We also need to add a div around the content on the frontend. We can, and will, change this up later but for now this will continue to show the iterative nature of block development.
At this point, there are a number of ways in which you may opt to implement your changes. For me, I’m a fan of simply launch the dev tools in whatever browser I’m using (I’m a fan of Brave or Firefox) and then inspecting the elements that I need to style.
So the first thing I’m going to do is to modify the the aave function one more time to add a wrapper around the {attributes.content} so that it inherits some of the styles of the theme I’m using.
save: ({ attributes }) => {
    const blockProps = useBlockProps.save();
    return (
        <div {...blockProps}>
            <div>{attributes.content}</div>
        </div>
    );
}
Next, I’m going to add the following styles to my index.scss file:
.entry-content .wp-block-tm-tm-block-demo div {
    font-family: -apple-system, BlinkMacSystemFont, Segoe UI, Roboto, Oxygen-Sans, Ubuntu, Cantarell, Helvetica Neue, sans-serif;
    font-size: 13px;
    padding: 0 0 1em;
}
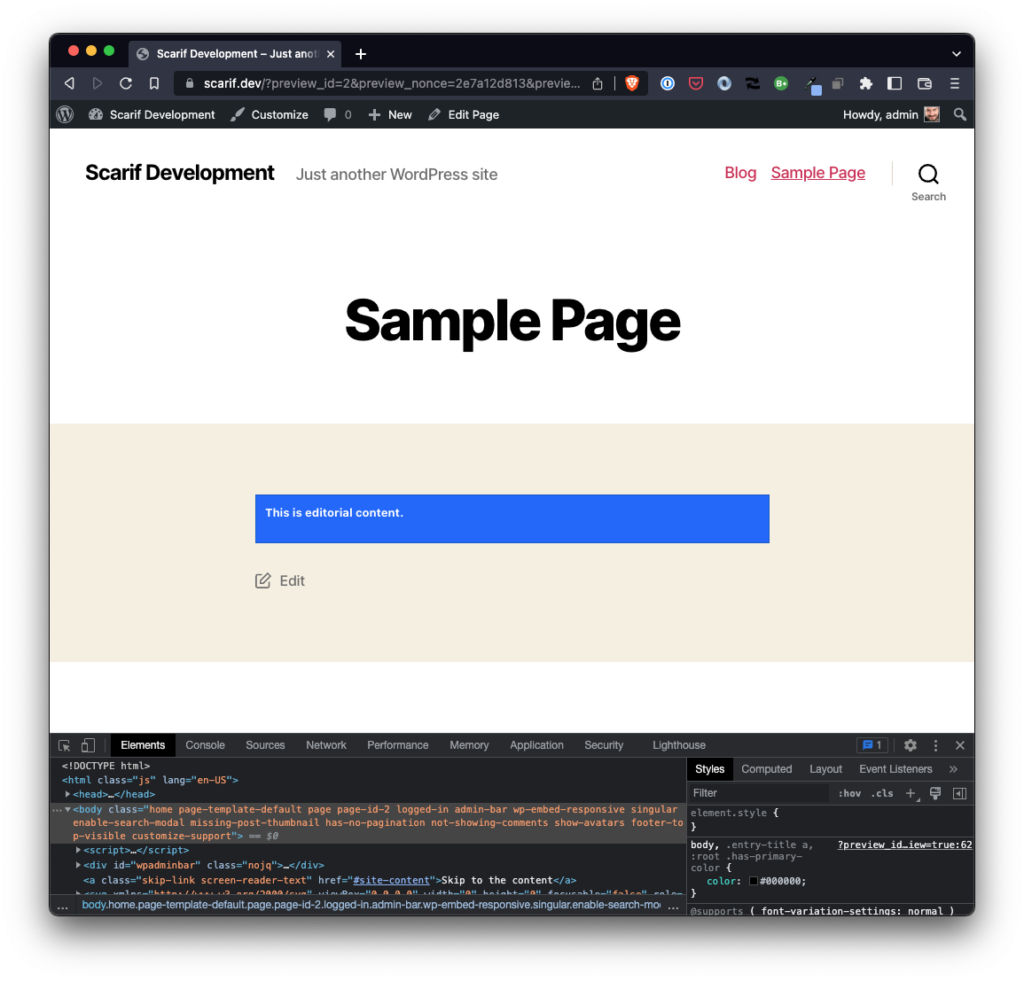
Note the reason I’m making sure to target the block within the entry-content selector is because I only want it to apply on the frontend. Sure, there are ways we can clean this up or do this differently given some of the work that the API provides but, for now, this gets us one step closer from what wee see in the backend:
To what we see on the frontend:
Lucky for us, though, there’s more we can do if we want to introduce features that allow the users to pick their only colors from within the editor.
⏭️ TODO
There are a variety of places we can go from here especially as it relates to styling our block and introducing features for users to customize what they see.
So starting in the next article, we’ll get into exactly that. It will likely require us removing some of the work we’ve done but also introducing new features into the Block Editor as well as working with features of WordPress that require us to expose options that save data into the post metadata table.
But it’s all possible given the APIs available to us by WordPress.