When I first started working with the Block Editor a few years ago, I wasn’t excited about it.
As a user, I was lukewarm about it simply because of change (I’m not a fan of change 🤷🏻♂️), though I’ve come around to it and don’t mind the new writing. Sure, it has its learning curve (especially as someone who has used WordPress for for 15+ years) but I still use it every day as a user and developer and am working on developing the muscle memory that comes with that.
As a developer though, I wasn’t fond of it at all. There wasn’t a lot of documentation and whatever was there was always changing. Whatever was working for this release may not work in the next release. That gets frustrating after a while and it’s is enough to demotivate you to step away from building things for it.
Plus, coming from someone who generally works on the backend of software, getting started in a completely new paradigm was tough. Not because I mind learning new things (can you work in this industry and not expect to learn new things?), but because however I may learn to do something now isn’t going to necessarily work later and this was happening at an incredible pace. The inconsistency was a problem.
That seems to have settled a little bit. Sure, there are still things that I’m sure I’ll hit on in this series of posts that aren’t going to work whenever future me reads this and I’m not particularly a fan of experimental packages but here we are.
Regardless, fast forward a few years, and I’m far more comfortable building blocks that I once was.
- I don’t and won’t claim to be as good as many of the frontend developers who are building and doing amazing things with the Block Editor,
- I’m not satisfied with the fact that there isn’t yet a consistent standard for how to organize project files (perhaps this will come in time, but we’ll see).
But that doesn’t mean I’m not at a place where I can’t get on with whatever may be needed from a block development standpoint.
- There are ways we can organize things to make our work easier. And that’s good enough for me.
- I know the basics and I know how to use the reference material.
- And if all else fails, there’s plenty of people online who are able to help or point me in the right direction.
- I also think it helps to try to figure out a mental map of how what we’re doing in JavaScript maps to what we do in PHP (or how it may be similar).
With all of that said, though, I thought it might be worth holding myself to the task I mentioned in the previous article on writing better the Block Editor tutorials.
Before going any further, I want to reiterate something that I’ve already shared:
Ryan Welcher and Learn WordPress are two places that seem to be the most popular for learning block development and I want to make sure they get the credit they deserve.
Starting with this post, I’m going to go write a series of articles in which I’ll share my experience as something like “a backend engineer is learning to build Block Editor blocks.” I’ll go from the very rocky beginning to the full functional ending.
Maybe it’ll help some of you along the way. And if not, at least it captures my journey.
Learning to Build Block Editor Blocks
🤔 Assumptions
When writing articles like this, it can be hard to know where to start so I’m going to assume if you’re reading this you’re in a similar position than I am:
- You’ve been working in software development for a long time, you’re familiar with the usual package managers for both frontend and backend development,
- You know how to install various utilities with Homebrew.
- You’ve been following along with the Block Editor for long enough to know it use React and can work with both JSX and vanilla JavaScript (and that it doesn’t necessarily matter which you use so long as you’re consistent – at least that’s my take on it).
Otherwise, I’ll never get to the core parts of actually building something.
🧰 Required Tools
So with that said, these are the frontend tools that I use to get up and running with block development (note that all of these can be installed with Homebrew):
- Node. This will also install
npmandnpx. The former is used to install dependencies, the latter is used to execute a command without actually having to first install it. - nvm. I recommend installing this because if you’re working with various projects that have different frontend tooling then you’re going to want to easily change versions of Node and its related packages. This makes it easy to do.
At the time of writing this article, the versions of each of the above software that I’m using are:
nodeis atv18.4.0npmis at8.12.1npxis at8.12.1nvmis at0.39.1
If you have latter versions of npm installed, I recommend installing nvm and then running the versions listed above as I know they work with the code in the context of this article.
Though I’m going to write this article with all of the code starting from scratch, there is tooling that we can use to help get us off the ground. But before using that, I want to layout the foundational aspects of block development so there’s a clear understanding of everything that’s needed. If you’re interested in said tooling, you’ll find it in the References section at the bottom of this article.
👷🏻♂️ Set up Your Plugin Structure
Whenever I’m starting to work on a block, the structure for the plugin isn’t much different from how it looks when I’m working on a backend utility except for I’m not using composer.json. Instead, I use package.json.
README.mdwill eventually include all of the details about the plugin from its description, its installation, and any other notes. If you’re familiar with anything I’ve published on GitHub, this shouldn’t be new.CHANGELOG.mdincludes all of the changes made in the plugin in the format evangelized by keepachangelog.com.LICENSEis a text copy of the GPLv2 though I document the plugin to work with GPL-2.0-or-later.plugin.phpincludes the necessary WordPress plugin documentation which I’ll showcase later in this article.package.jsonincludes all of the dependencies and packages I use when working on a block. I’ll also share this later in the article and outline what each package does.
This means my directory structure looks like the following:
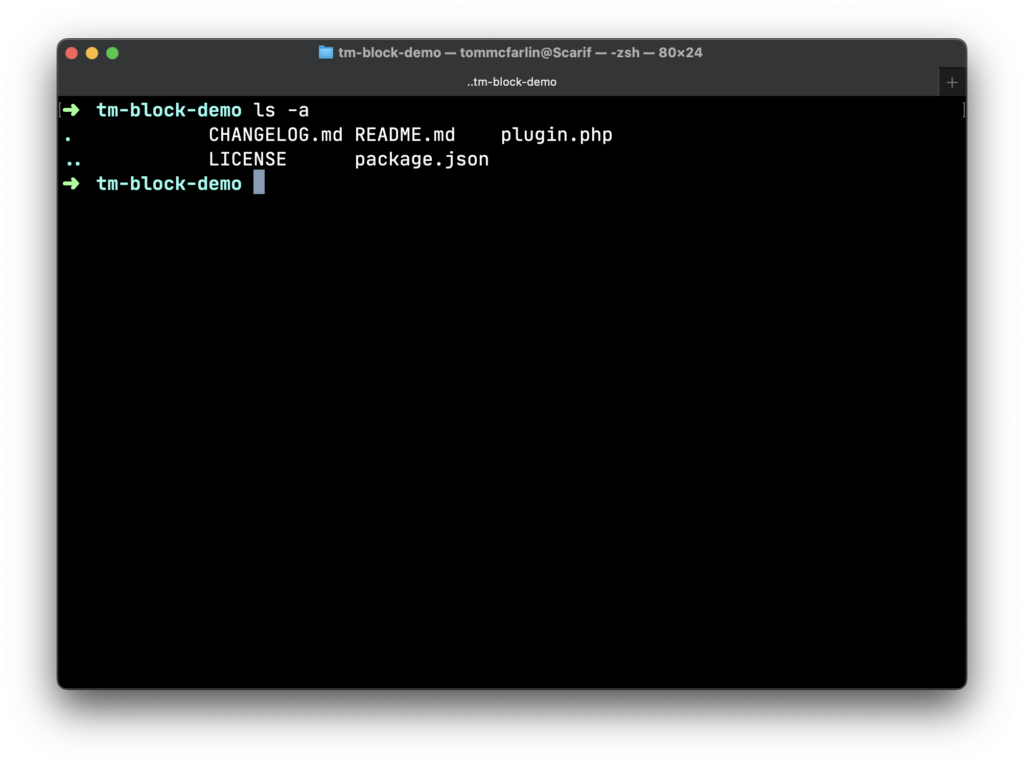
It’s exactly as described, but let me share the two core components that are necessary for it to work within WordPress.
⚒️ Required WordPress Dependencies
Plugin Header
I’m going to start with this because it’s the easiest and it’s something that all plugins require. You can see an example of what I’m talking about here.
For the Block Plugin I’m working on, mine looks like this:
<?php

/**
 * Plugin Name: Block Demo Plugin
 * Plugin URI:  https://tommcfarlin.com
 * Description: A demo plugin built by a backend engineer learning to build Block Editor blocks.
 * Version:     1.0.0
 * Author:      Tom McFarlin
 * Author URI:  https://tommcfarlin.com/
 * License:     GPL-2.0-or-later
 * License URI: https://www.gnu.org/licenses/gpl-2.0.html
 */

namespace TMBD;

defined('WPINC') || die;
At this point, this should do nothing more than show you exactly what you’d expect to see in the Plugins area of WordPress. Namely, the title, author, and the description.
Block Dependencies
The next thing we need to do is to define the dependencies used in package.json. These are the things that are going to help us build blocks, use various components in the Block Editor, and so on.
First, I’ll list the contents of package.json here and then I’ll explain what each dependency does:
{
	"name": "tm-custom-block",
	"version": "1.0.0",
	"description": "A demo plugin built by a backend engineer learning to build Block Editor blocks.",
	"author": "Tom McFarlin",
	"license": "GPL-2.0-or-later",
	"main": "build/index.js",
	"scripts": {
		"build": "wp-scripts build",
		"format": "wp-scripts format",
		"lint:css": "wp-scripts lint-style",
		"lint:js": "wp-scripts lint-js",
		"packages-update": "wp-scripts packages-update",
		"plugin-zip": "wp-scripts plugin-zip",
		"start": "wp-scripts start"
	},
	"devDependencies": {
		"@wordpress/scripts": "^23.7.1"
	},
	"dependencies": {
		"@wordpress/components": "^19.17.0"
	}
}
Aside from the standard name, version, description, author, and license properties, everything else under the scripts and devDependencies and dependencies are worth exploring.
I’ll start with the latter then explain what the scripts section does.
@wordpress/scriptsis a collection of reusable scripts tailored for WordPress development. In other words, it makes it easy to make sure we’re following proper licensing, testing, preparing the plugin for archiving, linting both CSS and JS and more. We’ll put this to use in future articles.@wordpress/componentsis where a lot of the cool stuff resides. This is where we’ll find many of the various UI components that we’ll use to build the interfaces within our blocks. This may include things like aRichTextcontrol or aPanelor aPanelRow. And if these don’t make sense, no worries. I’ll get to them in a future post.
With that in place, you should be able to run $ npm install from your terminal and it’ll create the node_modules directory. If you’re storing this code on GitHub, please make sure to add that directory to gitignore.
Assuming nothing goes wrong, you should see something like the following:
added 1604 packages, and audited 1605 packages in 2m

201 packages are looking for funding
  run `npm fund` for details

found 0 vulnerabilities
At this point, we’re ready to start setting up a block.
Creating a Block
Because there isn’t yet a definitive standard on how to do it, various tutorials are going to diverge here. But that doesn’t mean there aren’t patterns that are emerging. So I’m going to try to stick to said patterns when applicable (and if I don’t, I’ll always try to refactor towards them as this series continues).
Anyway, it’s fair to note that some tutorials will recommend scaffolding tools (which aren’t all bad!), some are going to talk about block.json, some are going to start talking about Block attributes (which aren’t all together different from content contained within block.json).
So we’ll start somewhere and build up from there even if some of the things we do initially aren’t as common.
The Frontend and the Backend
When it comes to working with blocks as they appear in the Block Editor and on the frontend of the website, I’m not sure how to best describe them. As backend developers, we tend to think of the backend of the application as being anything from the application layer down into the database or the file system.
But when it comes to working with blocks in the Block Editor, it’s a little different. Later in this series of articles, I’ll share how the Block Editor and its associated libraries gives us the ability to read data from the database such as post_meta but, for now, I’m going to start with something more basic.
And in this context, when I refer to the backend and the frontend, I’m strictly speaking of how data is rendered in the editor and how it’s presented to what’s rendered in the browser when previewing an article or viewing a published article.
Block Metadata
One of the key pieces to building a block is knowing how to use block.json. I’ll write about this in more depth as the series goes on but the short of it that block.json allows us to define certain aspects of our block that will be read by WordPress and rendered in the editor.
There’s an entire schema for how to set it up which I’ll link in the reference material but I’m just going to to include the bare necessities before moving forward with the first block.
The initial block.json that’s required to start looks something like this:
{
    "$schema": "https://schemas.wp.org/trunk/block.json",
    "apiVersion": 2,
    "name": "tm/tm-block-demo",
    "version": "1.0.0",
    "title": "Block Demo",
    "category": "text",
    "icon": "flag",
    "editorScript": "file:./index.js"
}
The only two things that are required are title and content however I include a little more information to give context to the block and to help prevent any collisions with other blocks.
- The
schemaattribute provides a reference to what I’m using as the standard against which I’m writing myblock.jsonfile. - The
apiVersioninforms me and anyone who references the code which version of the Block API I’m using. At the time of this writing,2is the most recent. - The
nameattribute is includes a prefix oftm/. This is a good practice, just as we usenamespacein PHP so that we don’t have collisions with other blocks. - The
versionrefers to the current version of the block. I keep this in sync with the version in the plugin header and in thepackage.jsonfile so it’s clear no matter where you look. - The
titleattribute refers to the name of the plugin. - The
descriptionproperty is the same description I give in the plugin header and thepackage.jsonfile, too. categoryis something that will change throughout this series of articles, but it tells WordPress where to place our block in the group of blocks that are available in the Block Editor.iconis a simple visual indicator associated with our block. These are retrieved from Dashicons. Again, I’ll change this as the series continues.editorScripttells WordPress where the primarily block script relies. This script will include all functionality for this article and future articles.
At this point, we need to update our directory structure, our plugin.php file and add a block.php file to the plugin.
First, our directory structure will look like this:
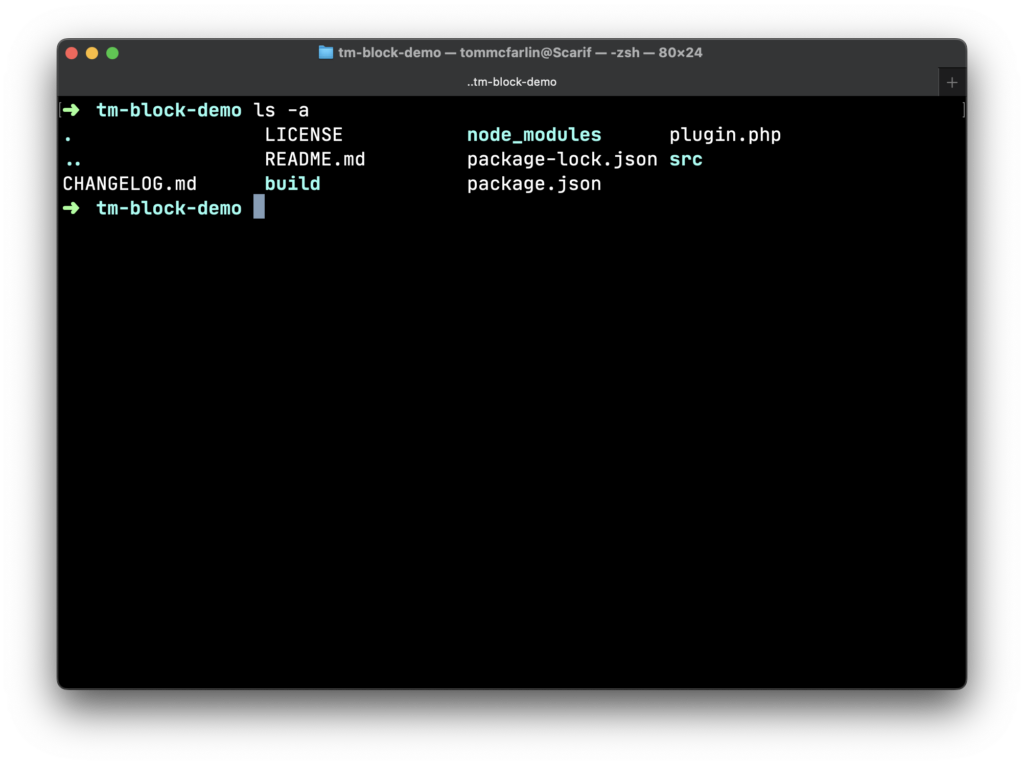
Notice the addition of the build directories and the node_modules directory as well as the package-lock.json files. These are a result of running npm install. But the primarily takeaway from this screenshot is to notice the src directory.
Before looking in there, make sure your plugin.php file looks like this:
<?php

/**
 * Plugin Name: Block Demo Plugin
 * Plugin URI:  https://tommcfarlin.com
 * Description: A demo plugin built by a backend engineer learning to build Block Editor blocks.
 * Version:     1.0.0
 * Author:      Tom McFarlin
 * Author URI:  https://tommcfarlin.com/
 * License:     GPL-2.0-or-later
 * License URI: https://www.gnu.org/licenses/gpl-2.0.html
 */

namespace TMBD;

defined('WPINC') || die;

add_action(
    'plugins_loaded',
    function () {
        include_once 'src/block.php';
    }
);
Then, in your src directory make sure block.json is included. Then, add you a file called block.php that looks like this:
<?php

/**
 * Registers the code with the block editor.
 *
 * @author Tom McFarlin <tom@tommcfarlin.com
 * @since 29 August 2022
 */

namespace TMBD;

add_action(
    'init',
    function () {
        register_block_type(
            dirname(__DIR__) . '/build'
        );
    }
);
Here, we need to diverge our conversation a little bit.
Understanding the src Directory
I’ve already described the purpose of block.json above but the reason we need to place an additional PHP file within the directory is because current best practices for Block Editor development expect block source code to reside in the src directory.
Finally, within the src directory, we need to include an index.js file. This is where the core block functionality begins. Note that if you’re a backend developer, it’s key to pay attention to how this file works as we’re going to be using JSX, referenced at the end of the article, to work with our code.
Starting Our Block
To start, we’ll set up index.js to look like this:
import metadata from './block.json';
const { name } = metadata;

registerBlockType(name, {
});
Before going any further, there are some JavaScript syntax that are important to understand.
importis reading data from theblock.jsonfile we created earlier and it’s storing it in a variable calledmetadata.const { name }is what’s called JavaScript destructuring such that it’s taking apart the object that was created and reading a certain attribute for it. Destructuring is kind of weird at first (especially from an object-oriented background) but once you get the hang out it, it’s pretty easy to work with (and can be really convenient). I’ve linked a reference to it at the end of the article.
Essentially what we’re saying is:
Read the block configuration file into a variable named metadata and then deconstruct the object and read the name property. After that, we’ll register the block type with WordPress using that name.
At this point, we can activate the plugin. But something interesting happens (or maybe not depending on what you expect): You’ll see the block appear under the Text label but it doesn’t actually do anything.
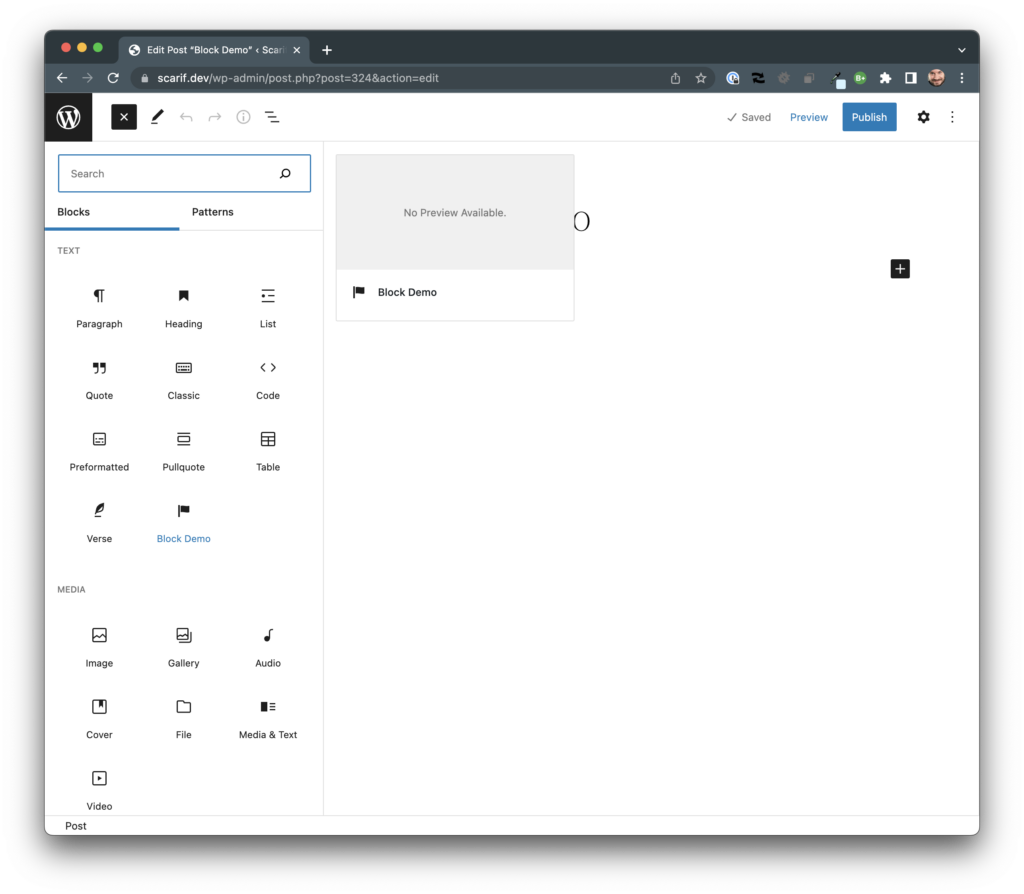
This means we have a little more work to do.
Displaying Editor Content and Frontend Content
The last thing we need to do is to add an edit function and a save function to our index.js file. Though I don’t think they are as clearly named as they could be, they are name easily enough such that we can create a mental map of what goes where.
- The
editfunction is used to render the content of our block within the context of the Block Editor. - The
savefunction is responsible for how the content added in the editor will be saved to thepost_contenttable and render to those who view the site.
For this article, we’re going to start with something really simple and will elaborate on it for more in the rest of the series.
The edit function can look like this:
edit: () => {
    return (
        "This is content from the editor."
    );
},
And the save function can look like this:
save: () => {
    return (
        "This is content from the frontend."
    );
}
So the final copy of index.js will look like this:
import { registerBlockType } from '@wordpress/blocks';

import metadata from './block.json';
const { name } = metadata;

registerBlockType(name, {
    edit: () => {
        return (
            "This is content from the editor."
        );
    },
    save: () => {
        return (
            "This is content from the frontend."
        );
    }
});
Wait, though. Notice anything different? At the very top of the file, there’s a new line from the @wordpress/blocks package. Specifically, I’m talking about registerBlockType. This is an API call to WordPress to give it some information from what we take from block.json and what we pass into the object containing functions for edit and save. Like many other things, this is linked in the reference material.
After that, run npm run build from your terminal, refresh the browser, then click on the Block Demo option in the editor. Once done, you should see something like the following in the Block Editor:
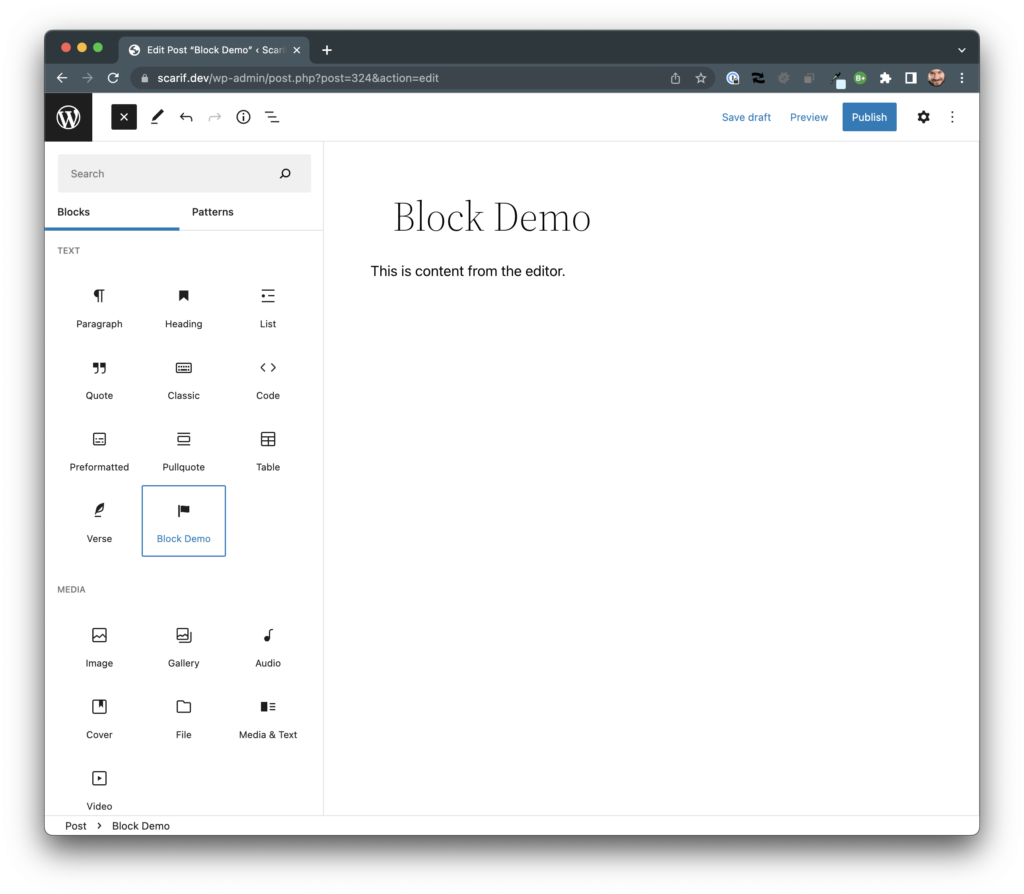
And something like this on the frontend:
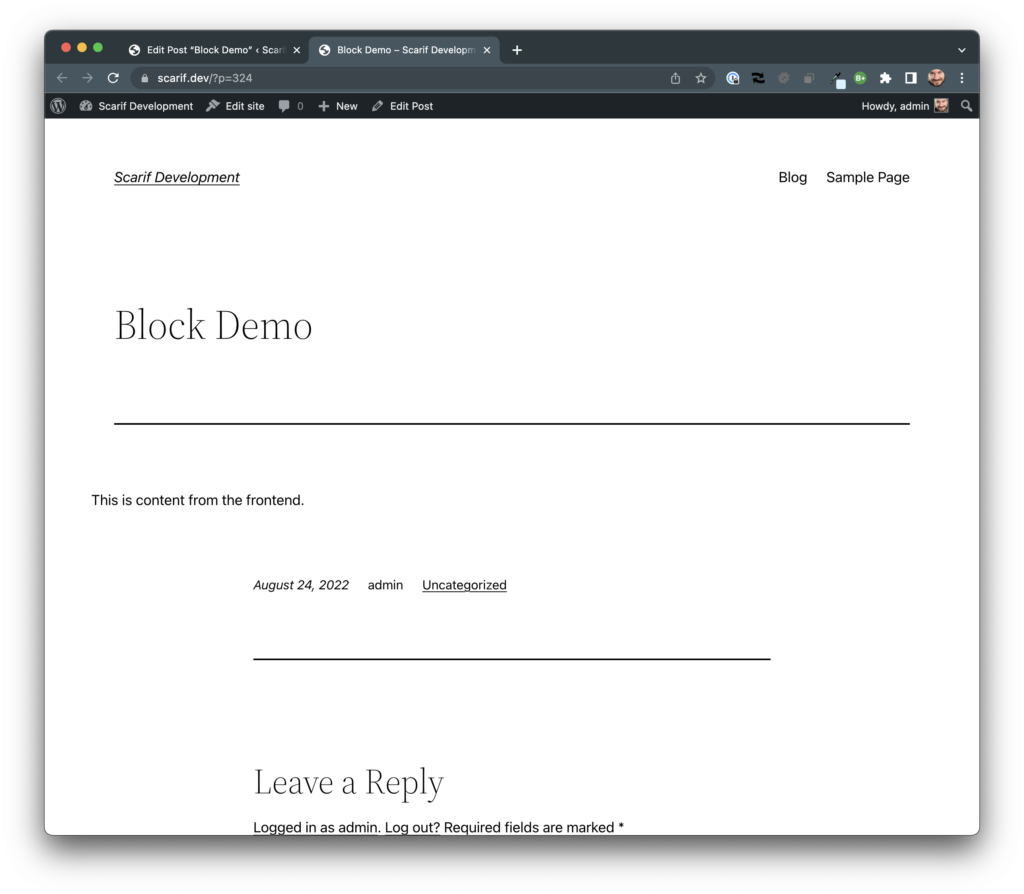
Though it has no style and isn’t just read-only, we have the foundation for a block on which to build.
⏭️ TODO
Though this may change, the thing we’re going to look at doing next is adding styles for both the frontend and the editor and some basic functionality to the block.
Specifically, I want to show how we can customize styling for the editor and for the frontend and I want to show how we can use built-in WordPress functionality to add some basic block functionality in the editor.
📚 Reference
@wordpress/create-block. Create Block is an officially supported tool for scaffolding WordPress plugins with blocks. It generates PHP, JS, CSS code, and everything you need to start the project.block.json. This is the official JSON schema for writing creating WordPress blocks. This documents all properties, attributes, and so on that can be used during block development.- Introducing JSX. From the handbook, “It is called JSX, and it is a syntax extension to JavaScript. We recommend using it with React to describe what the UI should look like. JSX may remind you of a template language, but it comes with the full power of JavaScript.”
- Destructuring. “The destructuring assignment syntax is a JavaScript expression that makes it possible to unpack values from arrays, or properties from objects, into distinct variables.”
registerBlockType. “Every block starts by registering a new block type definition. To register, you use theregisterBlockTypefunction from thewp-blockspackage.”