I ended the last article with a functioning block that shows one thing in the editor and another thing on the frontend. The reason for doing so was so we could see how to put together the basic foundation of a plugin for the Block Editor.
Now that we’re at this point, it’s much easier to start talking about things related to the Editor, things related to the frontend, how to start serializing data, how to start reading data, and so on. But because I’m trying to do this entire series as a backend engineer creating blocks – which is generally delegated to frontend development – I want to take it step by step.
In the last article, I wrote:
[T]he thing we’re going to look at doing next is adding styles for both the frontend and the editor and some basic functionality to the block.
As I continue to write about learning to build block editor blocks, we’ll continue with looking at adding styles to both the backend and the frontend.
In this article, we’re going to cover:
- adding controls to the block in the editor so we can control its placement within WordPress itself (or even remove it from the editor),
- ensuring what we see in the editor is what we see on the frontend
Like last time, there are going to be things we have to dive into that will require reference material and links to external resources. But consider that part of the journey of learning to build blocks.
Block Editor Blocks: Editing and Saving (Or Viewing)
The first thing I want to mention is, as I wrote about in the first article, the two functions with which we’ll be working are edit and save.
Personally, I think the functions are unfortunately named. It’s not that they don’t represent what they do, but they don’t represent just what they do. In other words, they do more than just allow us to edit and save content.
💭 A Digression on Function Names
edit actually isn’t all of that bad since that’s the function responsible for allowing us to actually edit content. But save is overloaded. Not only does it read saved content, it renders it, too. And, as we’ll see in future posts, other functionality.
So if you’re used to thinking in terms of how backend functionality works then you wouldn’t be far off in thinking something like:
editis for editing the content that’s saved in some type of data store,saveis where the data is sanitized and written into said data store,readis where the data is retrieved and validated before displaying it,- and
renderordisplayis a function for finally displaying it to the user.
But that’s now how blocks work. At least, not at the time of this writing. Instead, we just work with edit and save. So that’s what I’m going to use in the rest of the article. You can read more about this in the Reference material at the end of the article.
🗺 Where We’re Going
For starters, we’re going to do the following:
- add functionality to allow the block to be manipulated within WordPress,
- write styles to style our block,
- introduce them to the editor,
- introduce them to the frontend
The reason for doing this is to give a concrete example as to how various files and functions play a role in block development. Granted, there may be a time in which you want something in the editor to appear one way and not on the frontend but the goal I’m working towards with this series of articles getting functionality added to the editor and presentation the same across what the author sees and what the user sees.
Functionality
Recall that in the last article, the edit function looked like this:
edit: () => {
    return (
        "This is content from the editor."
    );
},
And this was sufficient for the demo but it only renders a string. Let’s make it a little more advanced such that it renders an HTML element. To that though, we’re going to have to get more into WordPress-specific block development.
As usual, I’ll link to all of this in the reference material at the end of the article but I’ll explain each step as I work through it.
First, I’m going to add some functionality to my block. Specifically, I’m going to the block the ability to be removed, to be moved, or to more generally be modified the in the context of the editor.
To this, I need to add a few things. At the top of index.js, I need:
import { useBlockProps } from '@wordpress/block-editor';
Then, in the edit function, update it to look like this:
edit: () => {
    const blockProps = useBlockProps({
        className: 'tm-block-demo-container'
    });
    return (
        <div {...blockProps}>
            This is content from the editor.
        </div>
    );
}
Obviously, there are a few things in the code above that aren’t yet explained (such as blockProps and className) but I’ll get the explanation momentarily.
Styles
Let’s introduce some basic styles to the Editor. For example, let’s have the block include the following:
- a background color,
- a border and border color,
- a specific font color,
- a specific width,
- some padding
First, let’s create an index.scss file in the src directory. This file will belong with other files like block.json, block.php, and index.php. Before adding any styles, though, we need to make sure we have the proper selector.
So at this point, go ahead and write the following code in index.scss:
.tm-block-demo-container {
    color: #fff;
    background: #0d63fd;
    border: 1px solid #0a58ca;
    font-weight: bold;
    padding: 0.5em;
    width: 100%;
}
Then in the same file, include the following (I like to place it above the registerBlockType function call):
import './index.scss';
The Code Thus Far
Note at this point, the following is happening in the code:
- We’re now using
@wordpress/block-editorwhich is a package that allows us to work with blocks within the context of the block editor (it seems a bit redundant, I know 🤷🏻♂️). - I’m passing a class name to the
useBlockPropsfunction within an object, - I’m adding the
blockPropsto thedivelement along with the JavaScriptspreadsyntax, - I’ve remove the quotes form the string because it’s standard text that will be rendered and I’d prefer it not include quotes. 🙂
You should be able to build the assets and see some changes in the editor such as controls and, if you open your developer tools, you’ll see that there’s a custom class name included with your block.
I’ll share a concrete explain of this in a moment along with full code and screenshots, but I want to get into the explanation first.
Explanation
Recall from the first post that we’re using JavaScript destructuring against to gain access to useBlockProps from the @wordpress/block-editor package. This particular function allows us to read the props into a variable (which I have as const blockProps above) which, in turn, gives the Block Editor the ability to manipulate the block inside of the editor.
Wait, though. What are props and why are we seeing them throughout all of this block-specific code? They are a central idea to React.
They are part of the concept of reusability. Props take the place of class attributes and allow you to create consistent interfaces across the component hierarchy.
How Props Work in React – A Beginner’s Guide
And since we’re passing a custom className into the function, it will get added to the div, as well.
After specifying the class name but before creating the block, we’re importing the styles that will be applied to the block. Whether or not the styles are already written doesn’t matter; the contents of the file will be included. So if the file is empty, nothing will be there; if the file includes styles, they will be applied (assuming that you have what you need to target your block – more on this in a moment).
Anyway, the whole {...blockProps} is what will bring up the controls so we can move or delete the block. More subtly, this also adds additional attributes to the element so that WordPress can manipulate it in whatever way it needs within the context of the application.
Finally, the className we’ve specified is what will give us the ability to style the element because it provides us a class name with a specific selector that we can target using CSS. This is purely optional, though. Case in point: Maybe you want a block that doesn’t need any specific targeting. In that case, don’t pass anything to the function.
A Working Demo
Assuming that you’ve applied all of the code that I’ve shared above, your index.json should currently look like this:
import { registerBlockType } from '@wordpress/blocks';
import { useBlockProps } from '@wordpress/block-editor';

import metadata from './block.json';
const { name } = metadata;

import './index.scss';

registerBlockType(name, {
    edit: () => {
        const blockProps = useBlockProps({
            className: 'tm-block-demo-container'
        });
        return (
            <div {...blockProps}>
                This is content from the editor.
            </div>
        );
    },
    save: () => {
        return (
            "This is content from the frontend."
        );
    }
});
The index.scss file should include the following:
.tm-block-demo-container {
    color: #fff;
    background: #0d63fd;
    border: 1px solid #0a58ca;
    font-weight: bold;
    padding: 0.5em;
    width: 100%;
}
And the last thing we need to update is block.php so that it actually includes the Block Editor assets that we see. To do this, add the following to that file:
add_action(
    'enqueue_block_assets',
    function () {
        wp_enqueue_style(
            'tm-block-demo-styles',
            plugins_url('build/index.css', dirname(__FILE__)),
            ['wp-edit-blocks']
        );
    }
);
This leverages the enqueue_block_assets function for adding the styles listed above.
Now, in your terminal, issue the following command:
$ npm run build
And assuming you haven’t changed anything with your installation since the last article, you should see something like this in your editor:
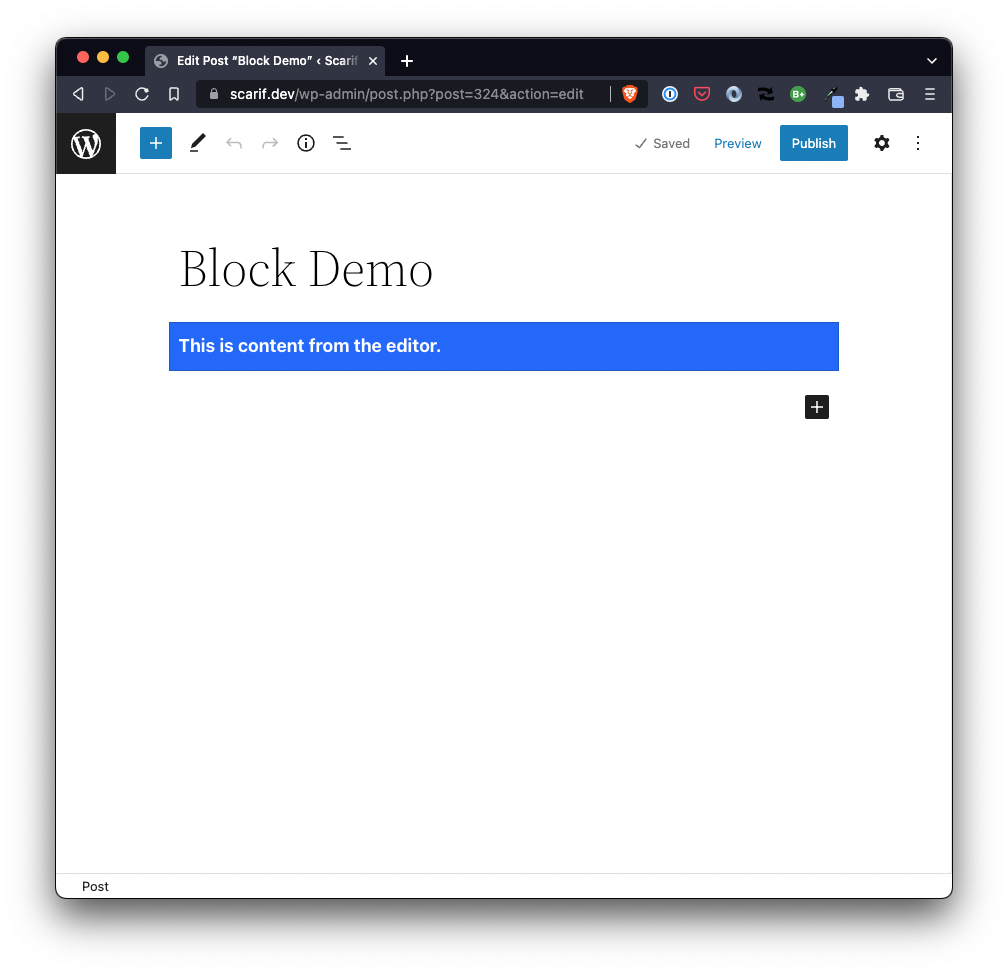
But the frontend still looks like this:
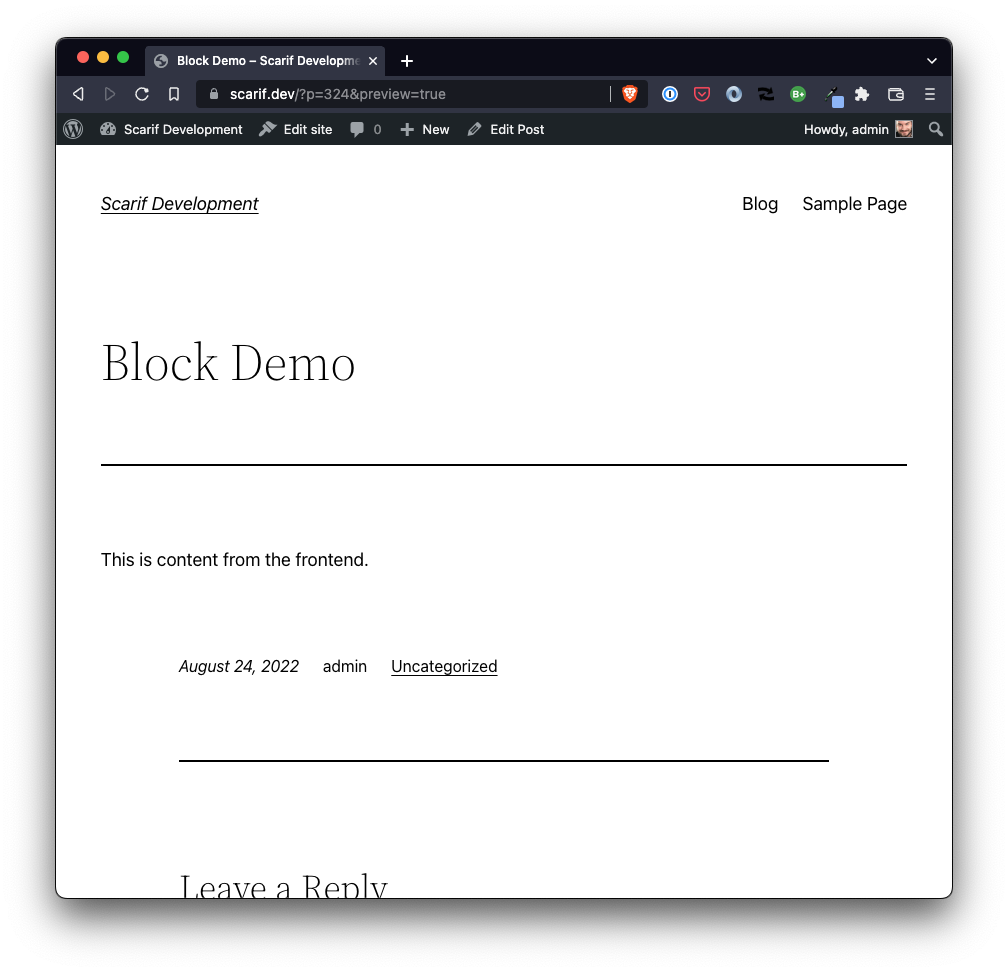
So what now?
The Frontend
The nice thing is that we’ve already talked about both functionality, implementation and the explanation so adding similar functionality to the frontend is trivial. At least at this point.
So the thing we need to do now is add the code necessary for the frontend.
For this example, it’s not much different from what we already have. In fact, I’d argue that it’s a little simpler since there aren’t actual controls that the frontend. Instead, it’s a matter of updating the save function to reflect the text that’s in the editor (should you choose to do this) and to apply the proper styles.
And remember, to apply the styles we need to make sure:
- we’re including the correct
blockPropsso the class name is added for the CSS, - and we’re included the stylesheet on the frontend of the block.
Note that in this example, I’m not going to add functionality for editing the text. I’ll do that in the next article. I will, however, be introducing the ability to make sure the frontend looks like what we see in the editor and that the frontend renders whatever text is set in the code.
To do this, let’s add the following to the save function just above the return statement:
const blockProps = useBlockProps.save();
Notice this is very similar to what’s done in edit with one exception: We’re retrieving values from useBlockProps via its save function. But what does that function actually do?
This ensures that the block class name is rendered properly in addition to any HTML attribute injected by the block supports API.
Block Wrapper Props
In other words, whatever attributes are injected into the block via the editor are applied to the block when rendered. This is much more useful when block start getting more complicated.
For now, though, we simply have a new class name to introduce. So, once again with the spread syntax, let’s update the save function:
save: () => {
    const blockProps = useBlockProps.save();
    return (
        <div {...blockProps}>
            This is content from the frontend.
        </div>
    );
}
This will apply certain selectors that we can target via CSS but we’ll need to update the index.scss to make sure that we do so. If you view the block in the frontend via your developer tools, you’ll notice that the class name on the block is .wp-block-tm-tm-block-demo.
So update index.scss to look like this:
.tm-block-demo-container,
.wp-block-tm-tm-block-demo {
    color: #fff;
    background: #0d63fd;
    border: 1px solid #0a58ca;
    font-weight: bold;
    padding: 0.5em;
    width: 100%;
}
Since we’ve already added an anonymous function for adding our stylesheet to the editor using a hook designed just for that, we get the functionality on the frontend as well.
Now run the following command in your terminal to update the assets:
$ npm run build
Then add a new copy of the block to your editor. You should see the following:
Now either click Save Draft or Publish and view the post in your browser. When you do, you should see exactly what you see in the editor except for the content of the block itself:

Notice here the only difference is that the public facing version of the block reads: “This is content from the frontend.” The editor variation of the block reads “This is content from the editor.”
⏭️ TODO
In the last article, I outlined out to set up the basic functionality of a block so that it can be added to the Editor and rendered on the frontend. This article covered how to style the article as well as add some standard functionality and make sure the block appears the same both in the editor on the frontend and the backend.
In the next article, we’ll start talking about how we can edit text within the context of the Block Editor, how to save the changes, and then view them on the frontend.
📚 Reference
- Edit and Save. When registering a block, the
editandsavefunctions provide the interface for how a block is going to be rendered within the editor, how it will operate and be manipulated, and how it will be saved. @wordpress/block-editor. This module allows you to create and use standalone block editors.enqueue_block_assets. Fires after enqueuing block assets for both editor and front-end. This allows us to add our own assets after WordPress has added its own assets.- How Props Work in React – A Beginner’s Guide. Props are used to store data that can be accessed by the children of a React component.
- Spread Syntax . Spread syntax allows an iterable, such as an array or string, to be expanded in places where zero or more arguments (for function calls) or elements (for array literals) are expected.
- Block Wrapper Props. This ensures that the block class name is rendered properly in addition to any HTML attribute injected by the block supports API.