Software Engineering in WordPress, PHP, and Backend Development

Category: Notes (Page 1 of 49)

Notes on programming-related problems that I’ve encountered while working on various projects.

Thanksgiving 2023

For nearly every year I’ve written, I’ve made sure to publish a post on the end-of-the-year holidays here in the United States.

Happy Thanksgiving!
This is the earliest Thanksgiving photo I have in my library.

It’s neat to see what I wrote on this day 10 years ago in comparison to now:

For those of you who are in the United States and are celebrating Thanksgiving, I hope you guys have an awesome day hanging out with your family, friends, eating, sleeping, and generally enjoying the day off.

A lot has changed both personally and professionally since then (though I’m still working in the same industry and enjoying it as much as I always have), but the message is consistent: If you’re in the US, I hope you enjoy the time off; if you’re elsewhere, I hope you enjoy whatever you’re doing today, too.

Block Notes: Generate a Reference to a Block

I’m working on a block that, like many, isn’t limited to a single instance in the editor (and thus not the frontend); however, because there are certain features of the block I want to manipulate when the page loads, I want generate a reference to said block.

For example, the structure of the markup in the edit function looks something like this:

<div className="wp-acme-block">
  <div className="wp-acme-block-editor">
  </div>
  <div className="wp-acme-block-preview">
  </div>
</div>

The functionality will allow the user to toggle the visibility of the editor container and the preview container. And to manage this functionality, I want to access the parent element of each one. Specifically, the one with the class wp-acme-block.


And this is easy to do with a couple of features of React:

  • useRef is a hook that allows for direct interaction with the DOM. It returns a ref object that maintains a property called current. This enables us to maintain a reference to a specific element.
  • useEffect is a hook that handles side effects in functional components. It allows us to do a lot of things (like fetching data) but also allows us to manually work with the DOM.

Given those two hooks, I can place a ref attribute on the primary container that I can then use elsewhere in the code.

First, in the header of the file add the following:

import { useRef, useEffect } from 'react';

Then at the top of the edit function, I have the following code:

edit: ({ attributes, setAttributes }) => {
    const blockRef = useRef(null);
    // ...
};

Then, in the edit function where I have the markup that I’ve shown above, I’ll add the ref attribute:

<div className="wp-acme-block" ref={blockRef}>
  <div className="wp-acme-block-editor">
  </div>
  <div className="wp-acme-block-preview">
  </div>
</div>

And finally, I can use this reference in the edit function before it calls return so I can refer to the element in other functions.

useEffect(() => {
  acmePreviewFunction(blockRef.current);
}, []);

So the full, relevant code looks like this:

import { useRef, useEffect } from 'react';

// ...

registerBlockType('acme/example-block', {
  // ...

  attributes: {
    // ...
  },
  edit: ({ attributes, setAttributes }) => {
    const blockRef = useRef(null);

    // ...

    useEffect(() => {
      acmePreviewFunction(blockRef.current);
    }, []);

    // ...

    return (
      <div className="wp-acme-block" ref={blockRef}>
        <div className="wp-acme-block-editor">
        </div>
        <div className="wp-acme-block-preview">
        </div>
      </div>
    );
  },
  // ...
});

Then passing the current property as an argument to other functions, you’ve got access to the block such that you can manipulate it with other JavaScript functions.

Further, the ref will refer only to the instance of the block so it won’t manipulate other instances of the block located in the editor (or, more specifically, the DOM).


Block Notes: How To Nest Related Blocks

When creating a custom category into which you want to group your own blocks, you may also want to create a block that can only hold blocks that belong to that group. Or, in other words, you may want to create a block that can nest related blocks.

For example, in the last post, I showed how to create a custom category into which blocks can be grouped. And that works well when you can want to create a group for related blocks.

This can be taken a step further, though. Say you want to create a custom block that can only hold blocks that are part of your custom category.


The primarily things that need to be done to achieve this are:

  1. Make sure the block you’re creating is also part of the same custom category.
  2. In the supports attribute, specifically list the blocks the block in question will allow.

The edit and save functions don’t need to be particularly fancy for this unless you want to achieve something more.

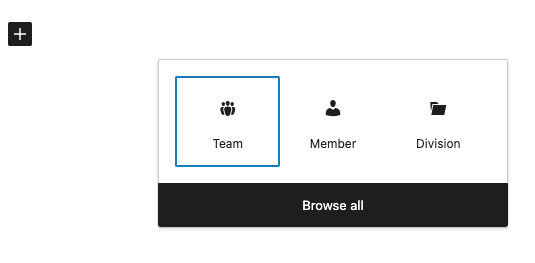
First, the attributes section of your block may look something like this:

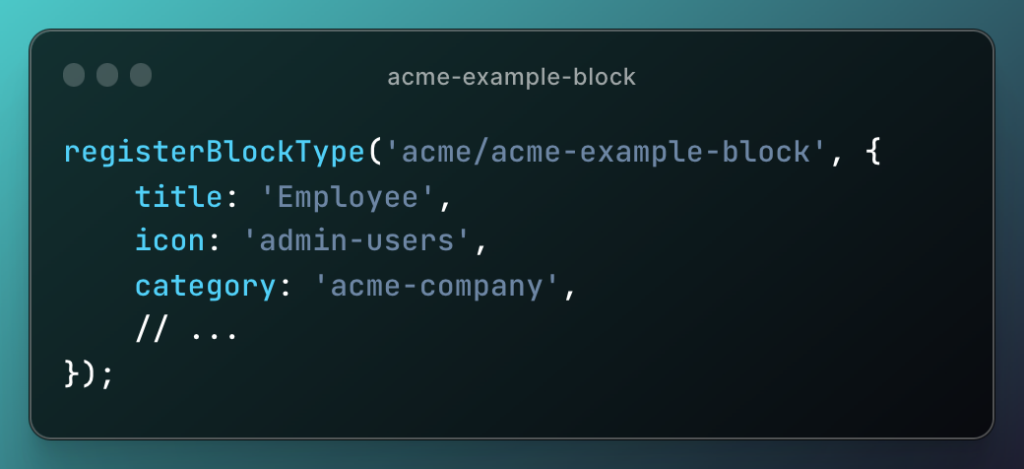
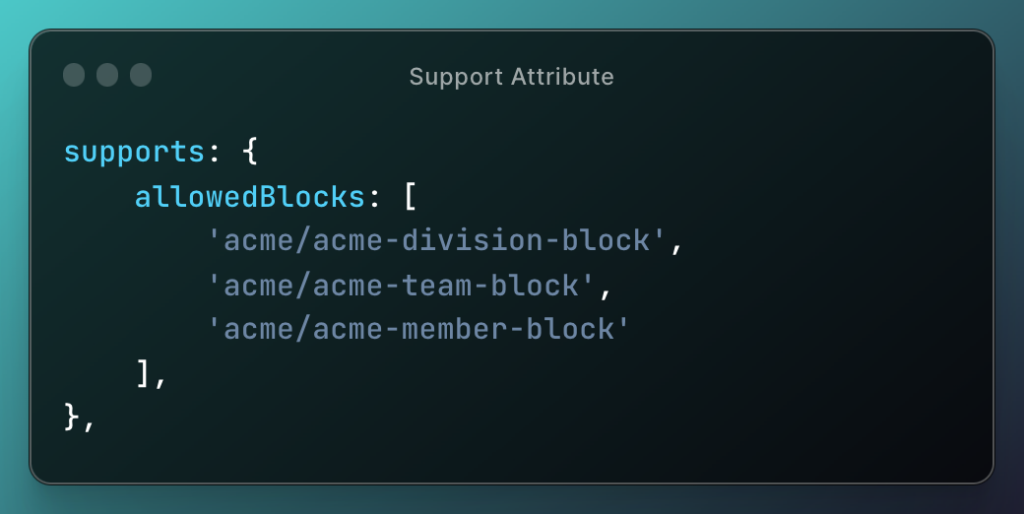
Notice here it has the standard title, icon, and category all blocks have (and the category matches what was outlined previously. Now add an allowedBlocks array to the supports attribute. This is where you can restrict the blocks that can be contained within this block.

The important thing to note is that you know the namespace and name of the blocks (these are of the format namespace/block-name and are usually was you find when calling registerBlockType.

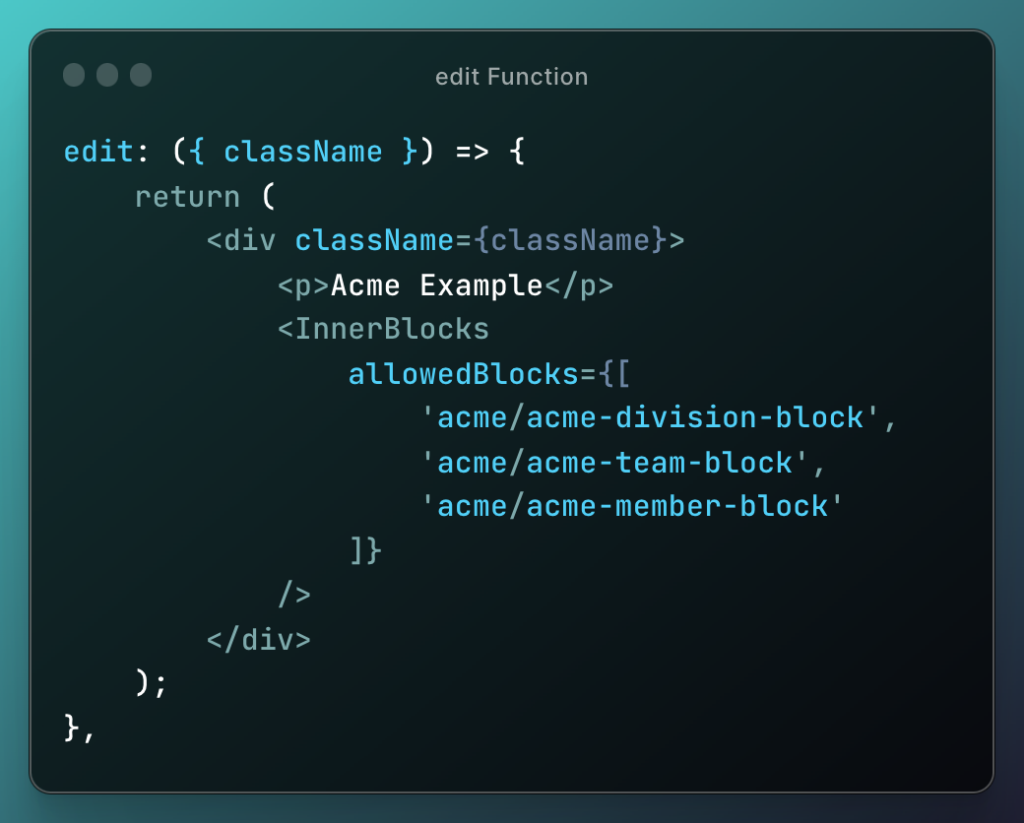
Finally, in the edit function, add this attribute to the InnerBlocks components. From the component in the GitHub repository:

InnerBlocks exports a pair of components which can be used in block implementations to enable nested block content.

The code for edit can, out of the box, look like this:

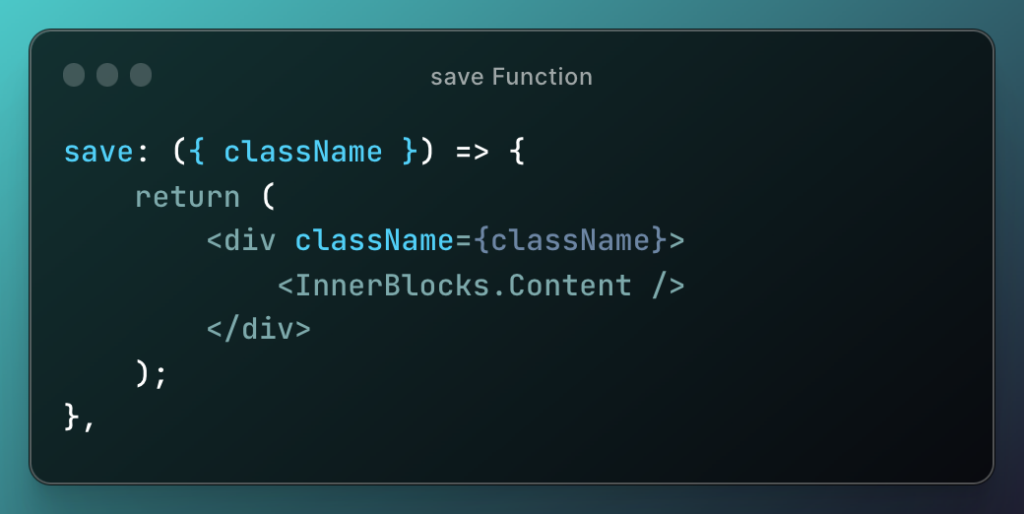
And the save function looks like this:

Finally, once you’ve done all of this and rebuilt the assets, then the block panel within the editor should yield something that looks like this:

And that’s it.


As mentioned earlier, you can see edit and save are simple. It’s possible to make them as elaborate as needed, but if you’re just building a container to support your custom blocks, this is all you need.

Block Notes: How to Register a Custom Block Category

It’s been a while since I’ve done any custom block development. In fact, the last time I called bankruptcy on any content was when I was writing about building blocks for WordPress.

A bit has changed since then, though:

  • the way in which blocks are developed has improved,
  • and I’ve finally gotten a little more experience.

That said, there are still things that are less familiar since I spend more of my time working predominately with PHP, WordPress-adjacent tools, and custom plugins, too.

But I think it’s worth sharing a few notes that I’ve picked up if or no other reason than I can refer back to them in the future. So for the first note in these “block notes,” here’s what has to be done if you want to register a a custom block category for any custom blocks you’re building.


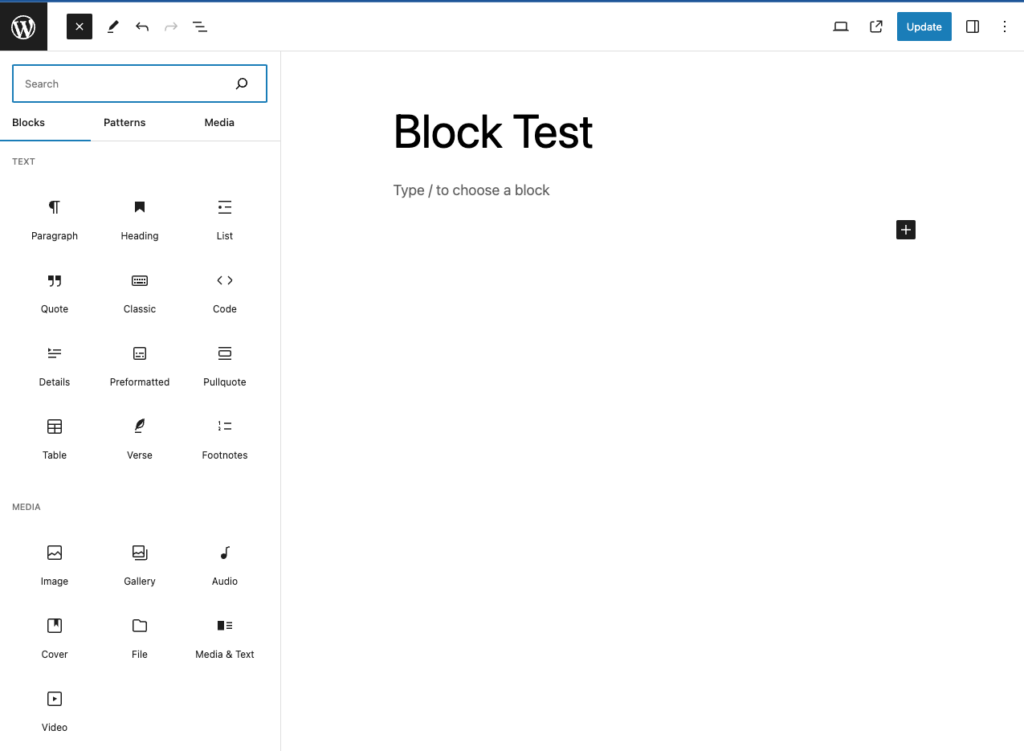
In the screenshot below, you’ll notice under the Blocks tab, you can see categories such as Text and Media:

But if you’re working on a set of custom blocks that don’t fit into these categories or that should belong to a category of their own, this is how you set it up your plugin to accomodate.

For the sake of example, let’s create a custom categories called Acme Company.

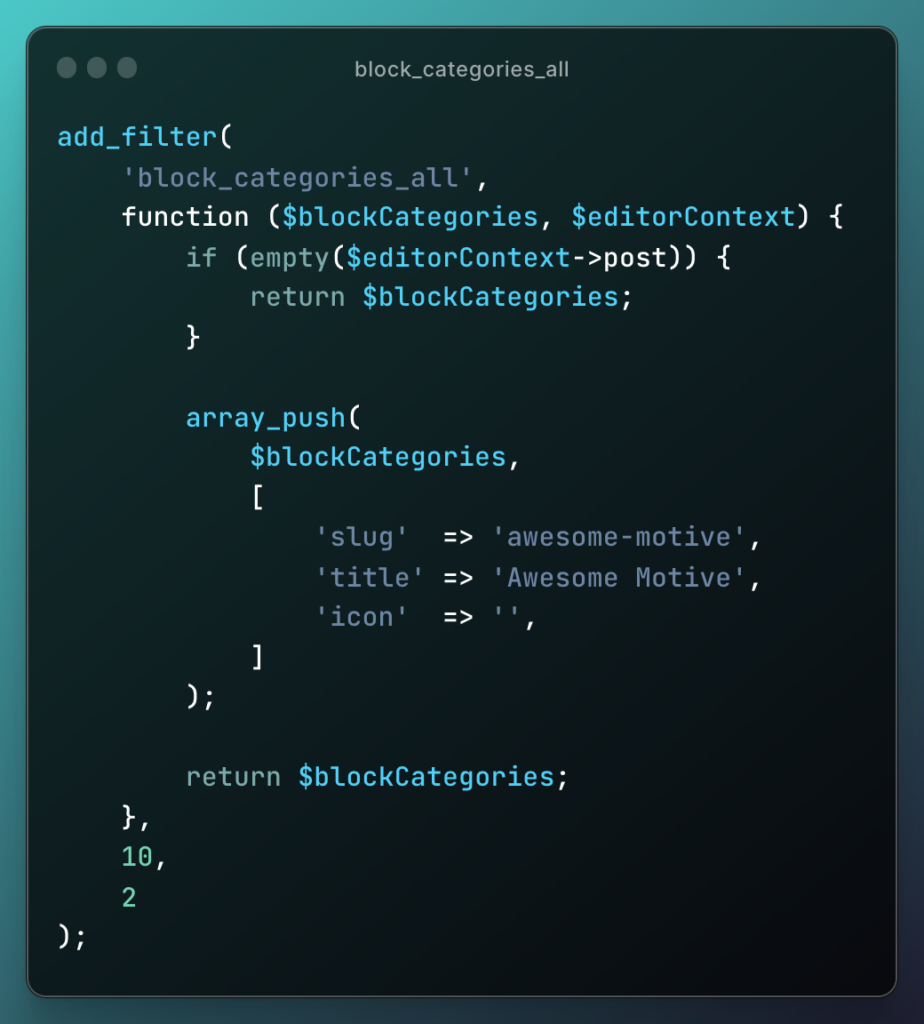
First, leverage the block_categories_all filter.

Filters the default array of categories for block types.

In the plugin bootstrap, you can add the code like this:

Notice in the code above, we’re creating a category called Acme Category. This is what will show up in the side back of the available blocks whenever we begin registering our own blocks.

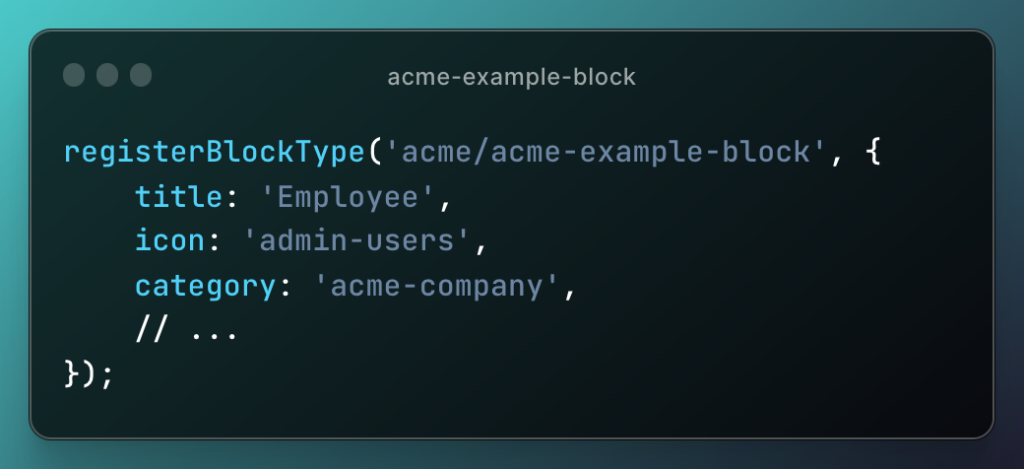
And now, across the various JavaScript files in which blocks are registered, we add the category property whenever we call registerBlockType.

Registers a block type. The recommended way is to register a block type using the metadata stored in the block.json file.

For what it’s worth, I haven’t used a block.json file (at least note yet); but I do use registerBlockType in the JavaScript source in which the block file is created. For example:

Source code of how to add a custom category to a custom block that's created with the "register block type" function.

Now anytime a block is registered and includes this category, the block will appear alongside any and every block that all under the same category.

This can be useful whenever you’re trying to a build a library of related blocks, or if you’re ultimately going to be working with blocks that work with each other.

And I’ll cover this case in a future note.

Understanding Idempotency in REST API Design

This week, I read a great article relevant to anyone developing applications that include a REST API. It’s titled Every Programmer Should Know #1: Idempotency.

First, note that idempotence is:

The property of certain operations in mathematics and computer science whereby they can be applied multiple times without changing the result beyond the initial application.

wikipedia

In other words, in the context of REST APIs, the result of making a request shouldn’t change the state of the application more than once. That is, you make the same request multiple times, there should be no side effects such that the same result is sent each time.

Or, perhaps even more simply, if the same request is sent more than once, it’ll only be processed once.


Secondly, the crux of the article has a great breakdown of the various methods that should exist in a REST API:

  1. GET Method:
    The GET method is used to retrieve a resource from the server. It is an idempotent method because retrieving the same resource multiple times will not change the resource itself or cause any side effects on the server.
  2. PUT Method:
    The PUT method is used to update a resource on the server. It is idempotent because sending the same request multiple times will result in the same resource state as if the request had only been sent once. For example, if you send a PUT request to update a user’s email address with the same new email address multiple times, the user’s email address will only be updated once.
  3. DELETE Method:
    The DELETE method is used to delete a resource from the server. It is idempotent because deleting a resource multiple times will have the same result as deleting it only once. If the resource has already been deleted, sending a DELETE request for the same resource will not result in any changes.
  4. POST Method:
    The POST method is used to create a new resource on the server or to submit data to be processed. It is not idempotent because sending the same request multiple times will create multiple resources or submit the same data multiple times, resulting in different outcomes.

And keeping this in mind is very helpful when designing an API.


Ultimately, I share this because the article does a great job of breaking down the concepts of idempotency in REST API design and the supporting application. And it’s a good reminder to have on hand whenever I’m – or you, whoever you are ::s

« Older posts

© 2024 Tom McFarlin

Theme by Anders NorenUp ↑