TL;DR: This is the first article in a series in which I’m going to walkthrough how to use Ray in WordPress development. From installation, plugin creation, and both beginner and advanced use of the application.
Starting last summer, I started to use Spatie Ray in my day-to-day work. I’ve written a few posts about it:
- Debugging WordPress with Ray, Part 1
- Debugging WordPress with Ray, Part 2
- Install Ray Per Project at an Application Level
The more I’ve used the software and the more I’ve talked with other developers in the WordPress space, the more I see there’s potential for how to really leverage all the features the software offers beyond a glorified var_dump or print_r.

If you’re someone who’s comfortable writing code for WordPress but hasn’t gotten started with a debugger or is someone who is used to writing statements out to the browser, it’s my hope this series will provide you with everything you need to get started.
📝 Notes, Prerequisites, and More
I don’t necessarily have any pre-requisites as I’m going to be writing about Ray using an example plugin and project and doing so from the ground-up.
I do assume you have a local environment running and you’re comfortable working with Visual Studio Code or another IDE. When applicable, I’ll link to documentation that may be useful for setting up a development environment or diving deeper into a topic.
Though I plan to provide some explanation as to what we’ll be doing in a given step, such as installing Ray via Composer, I won’t necessarily be taking the time to show how to install Composer. Instead, I’ll link to other blog posts or available documentation to do that.
With that said, let’s get started with using Ray in WordPress Development.
Using Ray in WordPress Development
Set Up Your Development Environment
Before installing Ray, it’s important to make sure that you have a working development environment set up. For me, my development environment consists of the following:
💡Here’s a recent guide to how I setup my current system, how I installed PHP 7.4, and a less-recent guide to installing Valet.
📝 Note if you’re confused or perplexed by some of the versions of the software I have installed, these likely have more to do with what I use on a day-to-day basis but suffice it to say that these will provide a stable experience for what I’m going to outline in this series. I’ll try to keep this updated as I continue to work on this series.
Once you’ve got everything set up, I recommend making sure that you have all of the necessary WordPress Debug constants set in wp-config.php. Here’s how to do so using the following gist:
At this point, we can get started by setting up the scaffolding for a basic plugin that we’ll be using to demonstrate Ray’s capabilities.
Plugin Scaffolding
Right now, I’m not concerned with defining what our plugin is going to do. Instead, I want to focus on setting up the the template or scaffolding, for lack of a better term, for getting our plugin set up.
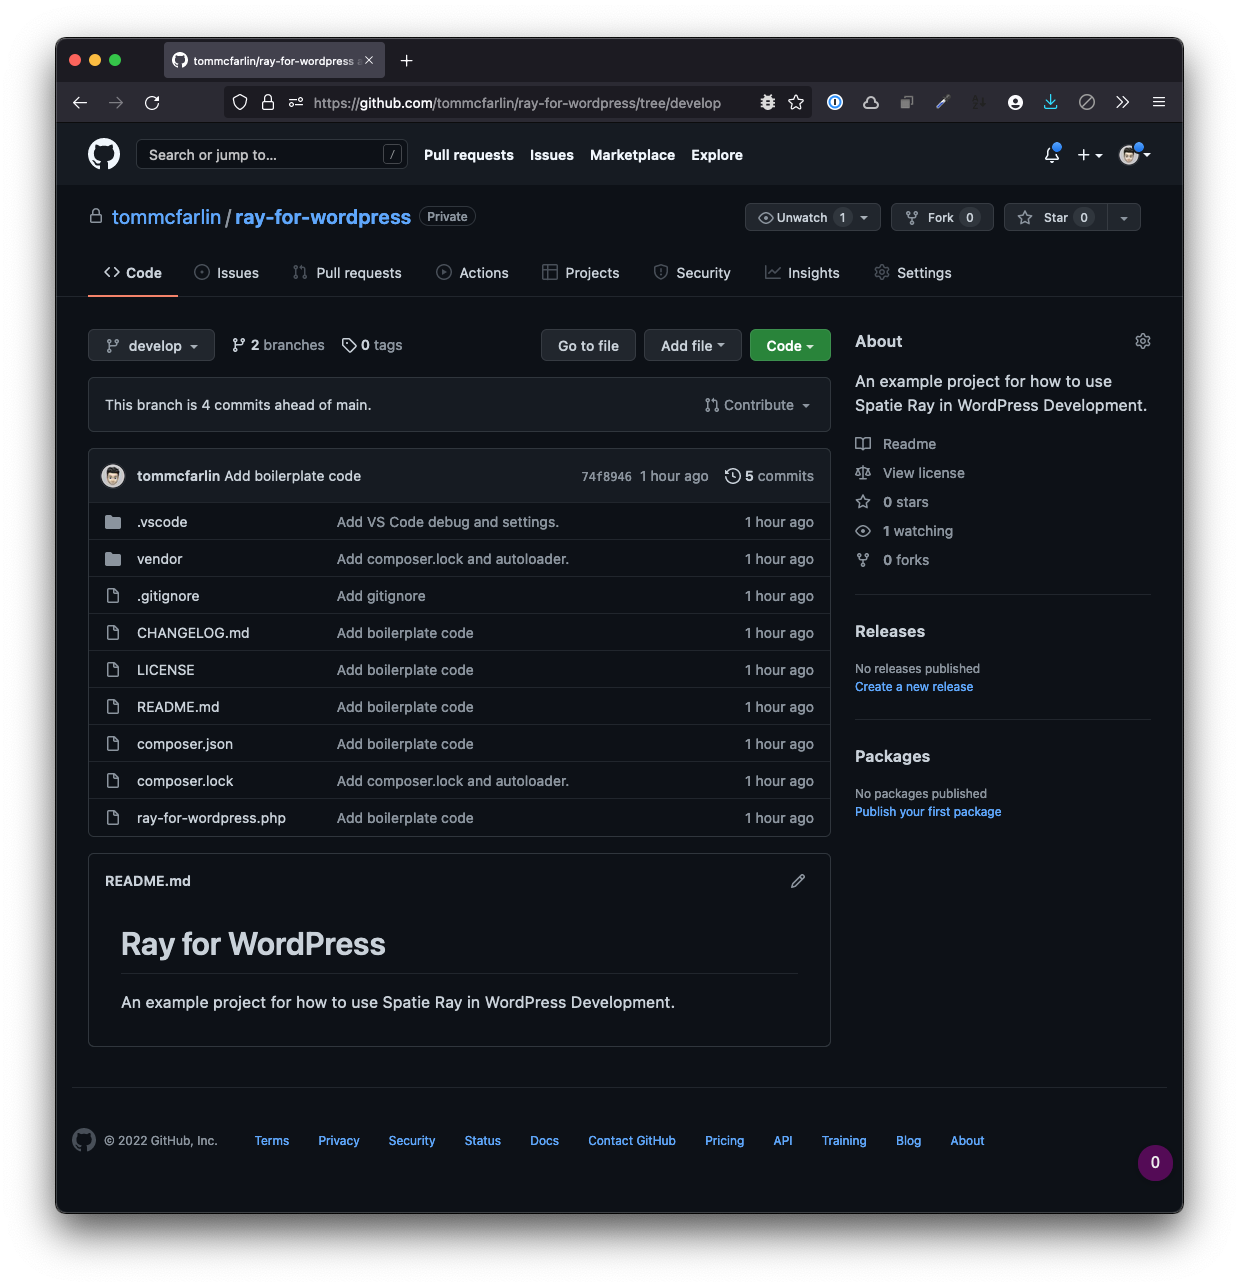
Though I’ll have a companion repository linked at the bottom of this section, I like to outline what we’re going to include before getting started so we’re aware of all of the files that are going into the plugin.
The plugin will consistent of the following files each with the following purpose:
CHANGELOG.mdwill capture the notes used when developing the plugin following the guidelines set on Keep a Changelog.LICENSEwill contain a copy of the GPLv3.README.mdwill contain the title, description, and installation instructions for the plugin.composer.jsonwill include the software we’re doing to be using to develop our plugin. Primarily, this will include Ray but I’ll also be using PHP CodeSniffer and its Code extension which I’ll cover later.composer.lockis a file generated after installing the dependencies outlined incomposer.json. This locks the versions of the software at a certain state so that if someone is to download the repository and install the software via Composer, it will use the versions specified here.ray-for-wordpress.phpis the bootstrap file of the plugin. This may eventually grow beyond what we have here, but for getting started, it includes everything we need.vendoris a directory that includes the autoloader and the dependencies installed by Composer.
There are also two hidden files and directories:
.gitignoreincludes all of the files that I do not want to check into source control along with the exclusions for what I do allow..vscodeincludes the files that I usually use when working with Visual Studio Code to get up and running quickly with my debug configuration and settings configuration. Note these are optional in the context of this series.
Finally, I’ll be using the develop branch of the repository for each article. After the article, I’ll merge the contents of develop into main and then I’ll tag the version with the date the article was publishing.
So the tag for this article will be 11012022 for 11 January 2022.
Setting up the Plugin
The two primary things I’m going to focus on in this section are composer.json and ray-for-wordpress.php as this is what’s going to allow us to get our initial plugin up and running with Ray in the next article.
If you’re going to be doing all of this manually, then here are the basic steps to follow (assuming you have your full development environment set up as outlined above) to get a plugin ready to run in WordPress:
- Create your plugin’s directory,
- Set up your
composer.jsonfile, - Install the dependencies,
- Set up the basic plugin file.
For the remainder of this article, we’re doing to do exactly that.
Create The Plugin Directory
In your wp-content/plugins directory, create a new directory called ray-for-wordpress. Next, touch two files named composer.json and ray-for-wordpress.php.
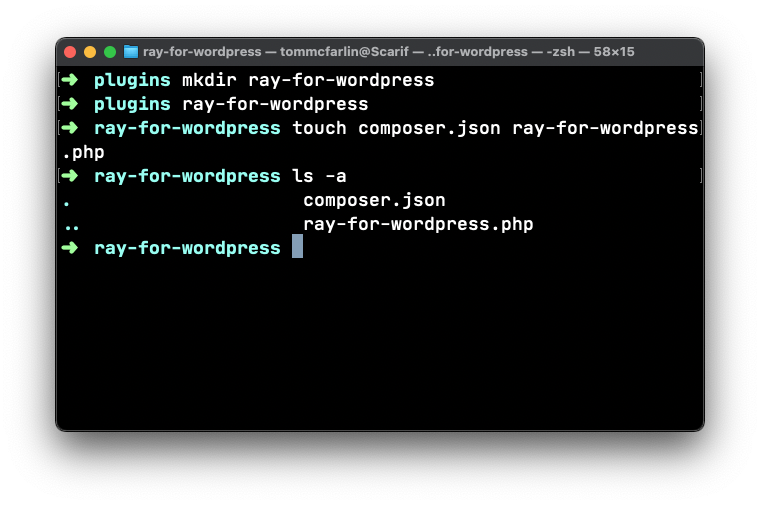
This will initialize two empty files in the directory.
Set up the Composer File
The contents of composer.json are going to be shown in a gist below. Note that you don’t need to understand everything that’s happening in the file right now. The most important thing to take away is:
- The
requiresection states the version of PHP that’s needed to run the software, - The
require-devsections states that we’re going to be installing PHP CodeSniffer and Ray.
Finally, note that require-dev means this is the software we’re going to be used in development. It will not be part of the package deployed whenever we prepare the software for production development.
Install the Dependencies
At this point, simply run $ composer install in the terminal and it will create a vendor directory that includes PHP CodeSniffer, Ray, and any dependencies those packages have. This will also generate a composer.lock file as previous mentioned.
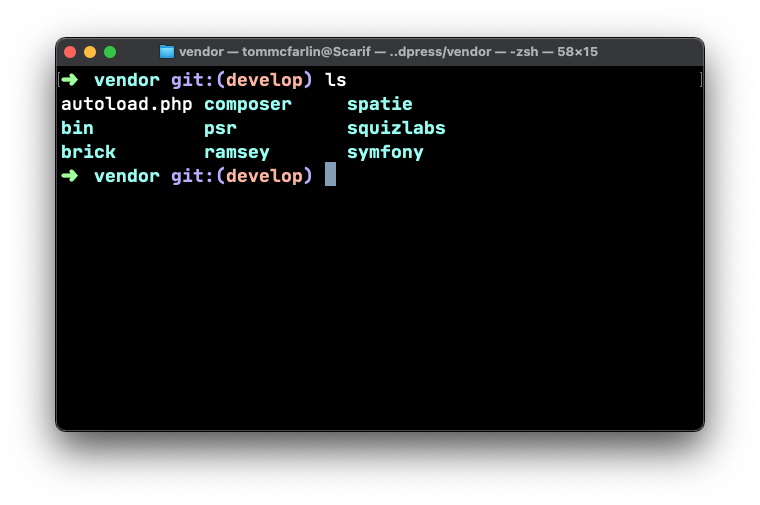
It will also define an autoload.php that will be useful should we need to add object-oriented code in our plugin in a future version.
Setup the Basic Plugin File
Right now, our primary concern is making sure the plugin loads without error in the WordPress application. This means that we want to make sure the plugin renders its name and description properly in the administration screen and that it’s successfully activated.
To do this, make sure the plugin’s file contains the following code:
And then save it. Next, navigate to Plugins > Installed Plugins in the WordPress administration area and activate Ray for WordPress.
Assuming all has gone well, you should see a success notification that the plugin was successfully activated. If not, there should be plenty of output as to why it didn’t activate thanks both to the way we’ve structured the plugin and how we’ve turned on debug mode in WordPress.
If you encounter any problems, please open an issue in GitHub.
Up Next
In the next part of the series, we’ll do the following:
- Write some code in the plugin that will perform some very basic functionality in WordPress,
- See how we can use Ray to review and debug the code in the plugin,
- See how to render good looking data structures in Ray.
In the meantime, be sure to set up your local environment and post any issues or questions or issues in GitHub so we can make this series as robust as possible.
☕️ Enjoying this guide? Consider Buying Me a Coffee to support these longer form articles!