So much of software development consists of actually maintaining projects after they’ve been released. Unfortunately, that’s where a lot of time is actually spent refactoring that didn’t necessarily have to occur if more planning had been done from the outset of the project.
Sure – some teams get this right, some teams don’t, and sometimes it’s just the nature of bad luck. After all, the best we can do is try to make the smartest decisions possible given the initial requirements.
When it comes to building plugins, there’s a specific way that I organize my WordPress plugin files that I’ve found to make bug fixes, future updates, and overall development much easier as a the lifetime of a plugin increases.
A Word About CodeKit
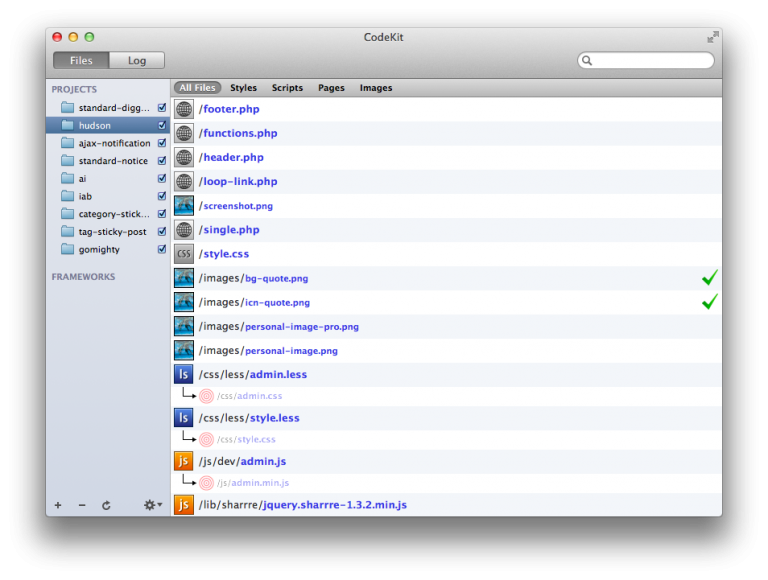
In previous posts, I’ve mentioned that I’m a big fan of CodeKit and that I’ll go as far as to say that it’s the single best tool that I’ve added to my developer’s toolbox in the past year.
I share this because a part of the way that I organize my files is directly related to my CodeKit configuration, and although I’ll be touching base on specifically what directories and files are managed by CodeKit, I realize that this particular organization won’t translate across the board.
As such, I’ll try to share the alternative way of managing files that are not managed by CodeKit.
Organizing WordPress Plugin Files
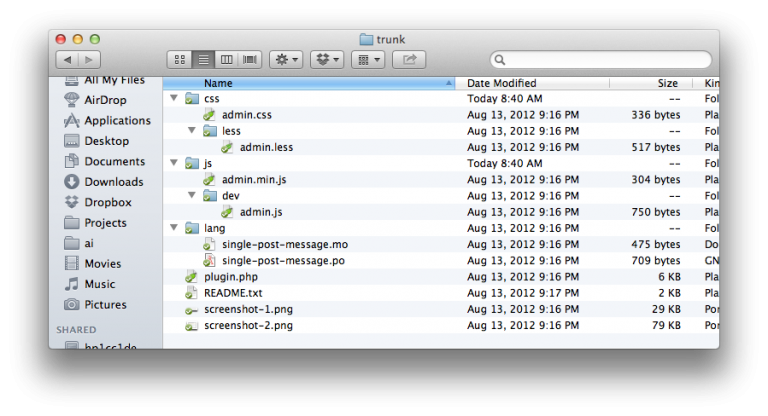
The Root Directory
The WordPress Plugin Repository requires two files:
- The plugin file
- A README file
But I’m a fan of including at least one screenshot. After all, when you go to a store, you don’t purchase a product that’s contained in a single color back that prevents you from seeing the actual product, do you?
To that end, you’ll also notice that include screenshot files in the root of my plugin directories. This leads to the following root-level organization:
css/js/lang/- plugin.php
- README.txt
- screenshot-1.png
Stylesheets
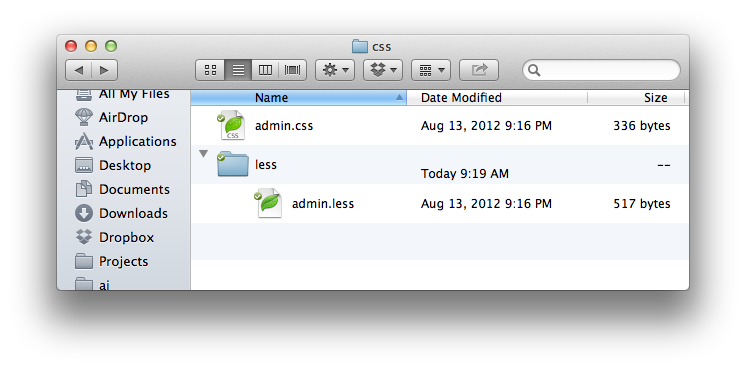
From there, I keep all stylesheets organized with in the css directory. Assuming that I’ll be providing styles for both the admin dashboard and the public facing site, I’ll usually include two files that are named specifically for their purpose:
- admin.css which obviously is intended to style the dashboard
- plugin.css which is meant to style the public-facing aspects of the plugin. I’ve I’m writing a widget, I’ll often name this file widget.css.
If you aren’t using CodeKit, then this is where the organization stops; however, if you do use CodeKit (or any other preprocessor, for that matter), then I’m a fan of creating a subdirectory named after my preprocessor of choice. In this case, it’s LESS. Within the less directory, I also include similarly named files with the proper extension:
less/- admin.less
- plugin.less (or widget.less)
I then configure CodeKit to write the processed, minified version of the files back to the css root directory with the same naming convention as above. That is, admin.css and plugin.css.
Once the LESS files are written out into the root of the css directory, they are off-limits. I only edit my LESS-based files.
JavaScript Sources
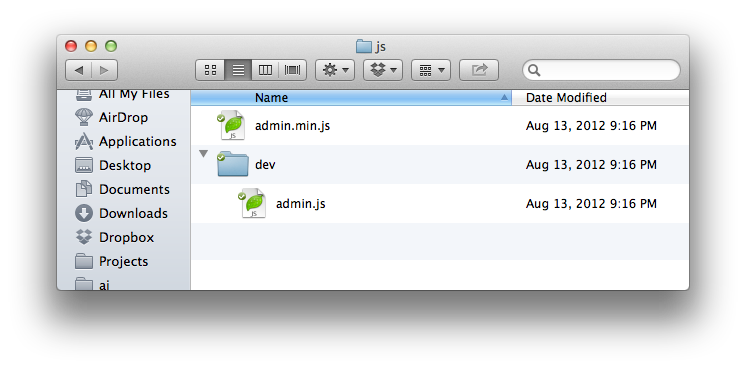
The JavaScript directory follows a much similar organization to the css directory in that I name my JavaScript dependencies based on what their area of responsibility is. That is, there are primarily two files:
- admin.js
- plugin.js (or widget.js)
Again, if you’re not using a preprocessor, then you can stop here; however, if you are using any type of linting utility and/or minification utility, then I recommend creating a dev subdirectory out of which you can work on the unminified files. When I do this, I usually create a dev subdirectory:
dev/- admin.js
- theme.js
Then, I configure CodeKit to write out the linted, minified files into the root of the js directory with the filenames of admin.min.js and plugin.min.js.
As with my LESS files, I only edit the files contained in my dev directory. The minified versions are off limits.
A Note on Registering and Enqueuing
This should be implied based on the organization of the files, but I only register and enqueue the minified versions of both the CSS and the JavaScript sources in the actual plugins themselves.
wp_register_style( 'plugin-name', plugins_url() . '/plugun-name/css/admin.css' );
wp_enqueue_style( 'plugin-name' );

wp_register_script( 'plugin-name', plugins_url() . '/plugin-name/js/admin.min.js' );
wp_enqueue_script( 'plugin-name' );
Naturally, the browser isn’t capable of parsing the LESS files and you lose the benefit of minification and linting if you enqueue the unprocessed JavaScript.
Language Files
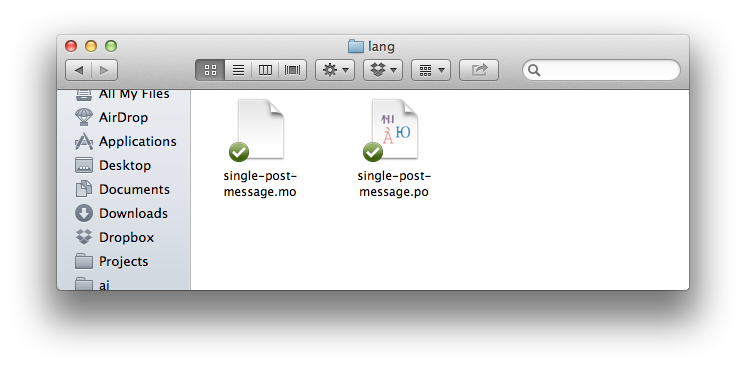
This is relatively straight forward: All of my language files – that is, the unprocessed PO files and the compiled MO files – reside in the lang directory.
They are then loaded up in the plugin using the following code:
load_plugin_textdomain( 'plugin-name', false, dirname( plugin_basename( __FILE__ ) ) . '/lang' );
For what it’s worth, I’m a fan of POEdit for handling localization.
Views
I’m a fan of the Model-View-Controller design pattern. These is heavily touted in frameworks such as Rails, CakePHP, and so on but isn’t necessarily pulled through in WordPress.
That’s not to say that I think it should be – it’s just a simple fact.
But I do like the idea of maintaining a separation of concerns as much as possible. When it comes to plugins – specifically with widgets – you end up with portions of HTML that will be rendered to the browser. These files are heavily-based on markup with some PHP potentially added in.
In this case, I also create a views directory out of which I host the dashboard-related and the widget-related work:
views/- admin.php
- plugin.php
I then include those files in the proper functions when necessary to display said views. For example, in the context of a widget, I’d do something like this:
public function form( $instance ) {

	$instance = wp_parse_args(
		(array)$instance,
		array(
    		'username' 	=> ''
		)
	);

	$username = strip_tags( stripslashes( $instance['username'] ) );

	// Display the admin form
	include( get_template_directory() . '/lib/widget/views/admin.php' );

} // end form
Given all other strategies listed above, this is more of the same just with respect to how I actually present data.
Additional Assets
Granted, this particular example doesn’t include any examples for files that include external PHP libraries, images, or other similar assets. In those cases, I usually follow suit with what I have:
- Images will be kept in an
imgdirectory - Libraries and third-party resources are kept in a
libdirecotry
Once the schema is defined, it becomes much easier to scale it out to include a wide arrange of other resources.
On top of that, following a file organization process like this makes it easy to know exactly where certain types of files will go based on their file and how to name to name them based on their purpose.
What Works For Me
All of that said, I’m not suggesting that this is the way to organize WordPress plugin files. I’m simply sharing the method that I use and what I’ve found to be successful. You can find both of these methods in place with the Widget Boilerplate and the Plugin Boilerplate.
I’m always interested in hearing how others approach this problem, so if you’ve got a different way that you go about it, have questions about my particular method, or have a suggestion to improve what I’ve shared here, please share it in the comments.


Leave a Reply
You must be logged in to post a comment.