If you’ve done any development on themes, plugins, or the core application itself, then you know that the team uses Subversion for WordPress development. This means that when you checkout the project, you’re either pulling down at least three directories, or you’re pulling down the trunk.
The challenge is figuring out a way to organize your local development environment so that it resembles the staging and production environment rather than what the repository looks like.
But this can be tough if you’re used to working with the trunk, with copying files, or with whatever crazy ways you’ve come up with managing version controlled files.
Here’s the most effective way that I’ve found to organize my installation when using Subversion for WordPress development:
1. One Directory To Rule Them All
When it comes to checking out repositories, developers will usually do one of two things:
- Check out the trunk, then manage all of the tagging and branching in the repository on the server
- Check out the entire repository, manage things locally, then commit everything back to the repository
I used to do the former, but I’ve begun to do the latter much more frequently especially when I need to introduce another directory (such as the assets directory) or I need to refer back to previous versions of the code in the tags
directory.
So, the first thing I do is create a parent directory in my wp-content/plugins
directory that I’ll use to check out the entire repository for my plugins:
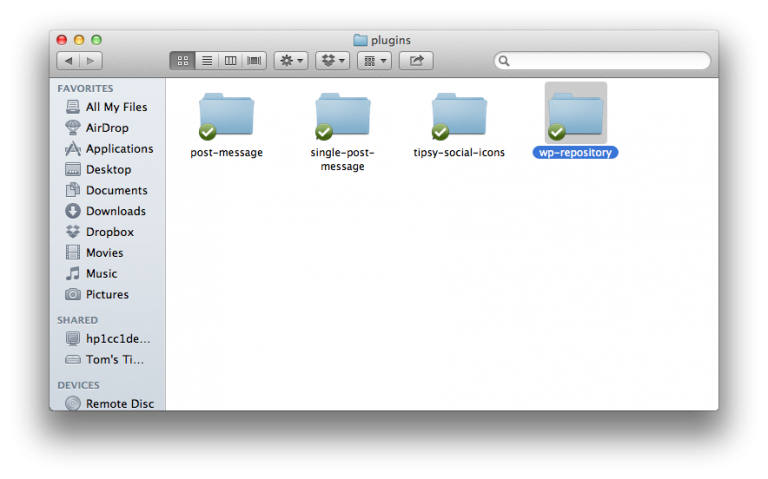
In wp-repository
, I’ll check out all my plugins and their respective subdirectories, too. I think of this as the parent directory for all of my versioned controlled work.
Notice that the entire repository for each plugin lives within the wp-repository
directory. This makes it easy to manage various assets and passed versions as well as do local development.
2. A Link To The Present
Next, I want the working copy of my plugin – that is, the trunk – to be visible to WordPress in the Plugin’s dashboard and I want to be able to setup my IDE so that I can work on the plugin as if it resides in its own directory in wp-content/plugins
.
This is easy to do: symbolic links.
If you’re not familiar with them, think of symbolic links as shortcuts – they are basically files that point to a directory elsewhere on the file system.
Say, for example, I’m working on my Single Post Message plugin. In wp-content/plugins
, I’ll create a symbolic link from single-post-message
to to wp-repository/single-post-message/trunk
. This creates a link from a file in my plugins directory to the working code in the trunk.
WordPress and the IDE will treat this as if it’s a normal plugin.
Assuming that you’re plugin repositories are located in a directory named wp-repository, here’s how you can setup a symbolic link:
- Open a terminal session and navigate to the
wp-content/plugins
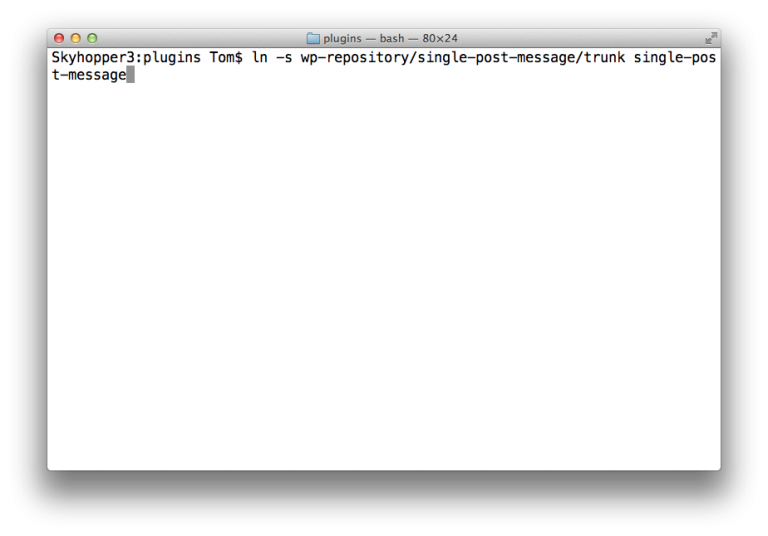
directory - Enter the following command into the terminal. This will create a link from the current location – that is, plugins – to the trunk
ln -s wp-repository/single-post-message/trunk single-post-message
From here, WordPress and your IDE will treat the symbolic link as if it’s just another directory.
3. Business as Usual
At this point, you can navigate around your plugin’s directory using your preferred IDE and work on the project as the source code itself actually lived in the plugins directory:
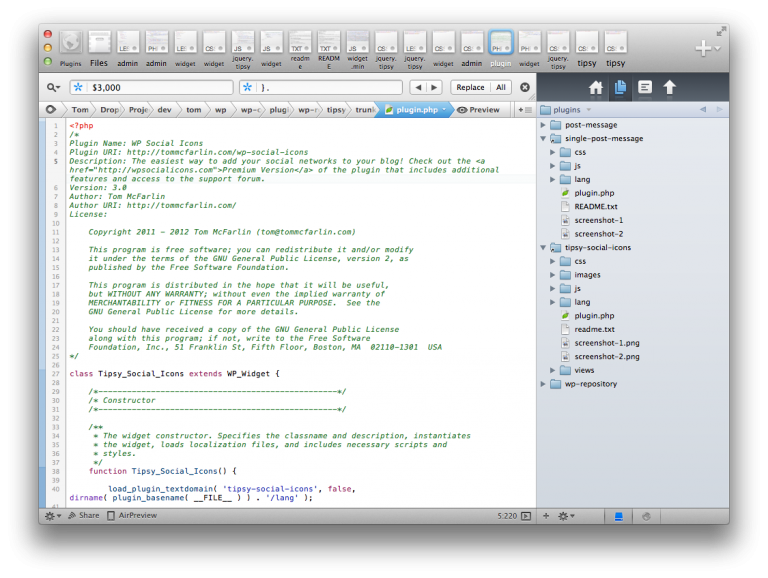
Symbolic Links are really just files pointing elsewhere, but the IDE should treat it exactly as a directory. If you were to expand the contents of the linked directory, it would display as if it was any other directory.
This makes it really easy to do work in the IDE, hop over to WordPress to check the results, and then get back to work without having to copy any files or deal with the overhead of managing directories with names like ‘trunk.’
4. Commit, Tag, and Release
Once you’re done with development, adding your new code, committing, and tagging is easy: Because you linked your plugin directly to the trunk, you’ve been making changes to the trunk all throughout.
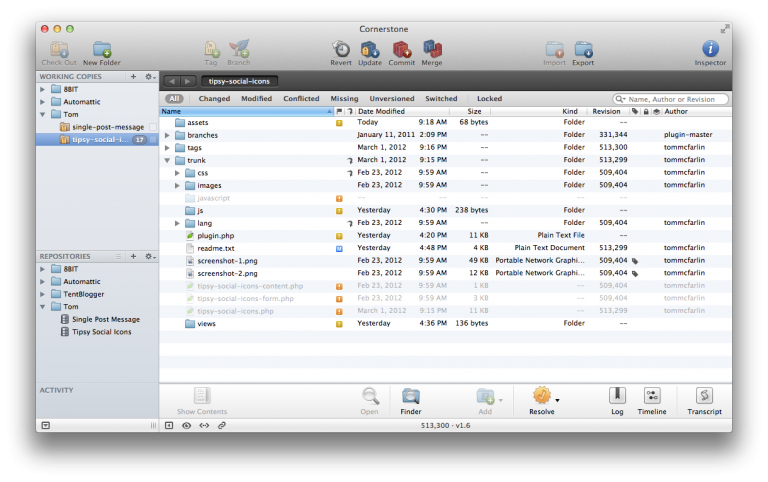
This means you don’t have to copy files, or do any kind of diffs on versioned files, or whatever other kind of voodoo you’ve been used to doing.
Instead, you just add the unversioned files, update the working copy, and commit. From there, you’re free to tag, and then ultimately release.
I’ve found this to be the easiest way to manage Subversion-based development on my local machines, but I’m always looking for suggestions on how to make this process even better so if you’ve got any, share ’em in the comments.
I haven’t done this with my subversion repos yet, but I do the same thing with all of my git repos.
For now, the majority of my GitHub repo’s treat ‘master’ as ‘trunk’ and then I tag each version, so I always work out of master.
This way, when I pull down from GitHub, I just place the repository in my plugin’s directory.
Hey Tom. Thanks for the post. I had asked similar question on one of your earlier posts.
Stupid question, but could you please help me in setting up the symbolic link on a windows machine with WAMP as the server.
There are a couple of options for doing this. If I recall correctly, you do the following:
mlink
commandBeyond that, I’m not sure. If that doesn’t work, let me know.
Hi Tom,
which version of WordPress do you use for your plugins/themes development: the svn version or a downloaded install from WordPress.org?
This article is really interesting , it will be great to see more like this one regarding how to set your WordPress install/environment for plugins/themes development with unit test and repository management for contribution and release branches. Thanks!
It really depends on what point in the WordPress development cycle and/or what’s the target version for the project.
When it’s getting close to a .X release (for example, with 3.9 on the horizon), I’ll develop against 3.8 and the 3.9 betas to make sure that everything is going smoothly. Sometimes I’ll also use prior versions depending on how much support I want to offer, but I try hard to focus only on the most recent versions.
That said, I also keep a trunk installation around. Sometimes I’ll develop using that, but it’s mostly there for if I have a chance to contribute a patch to core.
Hopefully this gives a bit of insight! If I have the chance, perhaps I’ll go more into detail with my actual workflow, but I gotta admit that the more time that I spend building for WordPress, the more refined my process becomes so what I’m doing right now may not be the case in a couple of, say, months :).
Thanks for this insights! It’s sometimes really tricky on how to maintain development environments. And also how to test your plugin or theme between multiple WordPress instances. I think there is room here for some articles ;)
This is really helpful — I’m just starting to really learn WP plugin development and I’ve been trying to wrap my head around how to avoid maintaining two different locations for my working files and my SVN files.
I set this up today, and for one plugin I’m working on it works fine. For another, however, when I use the sym link, I get an error of ” The plugin does not have a valid header.”
I don’t think it’s the actual plugin code: if I copy the contents of the trunk directory into a new directory at the top of the plugins directory, I can activate it just fine. So I really don’t think it’s the plugin; it seems to be they sym link.
I’m totally perplexed about what could be causing this — have you ever seen anything similar using this technique?
In version of WordPress < 3.9, symbolic links aren’t support and do not work; however, as of 3.9, this should work perfectly fine :).
Tom — thank you! As it turned out, right after I left this comment 3.9 dropped, I upgraded the site, and the sym link started working. I thought I was going crazy! :-)
Nope! Funny how that works, isn’t it? ;)
Hello
Thanks for this excellent tutorial. Can I adapt it to Windows and partially translate it into french?
For windows there is a utility called symlinker here:
https://github.com/amd989/Symlinker
Sure, just provide a link back to the original article, please :).
Thanks, of course as soon as I finish this adaptation and partial translation, I will tell it you. Promised.
To improve the local installation of WordPress, I place all the versions published in the/tags directory and add the/src directory in trunk/tags. Thus, I develop the alpha versions of the plugin in the/trunk/src directory, which can be accessed from any computer.
And latest release of the plugin is still available to download normally.
In this case, just make a symlink from /wp-content/plugins to /trunk/src
I named this /src directory as WordPress does in the core, but it may also well be called/dev.
Only thing special about /trunk/src is the “Stable Tag” of the readme.txt file, which points to the latest RELEASED version of the code who is in /tags repertory
Sorry if I wasn’t clear, I speak much better the french.
Hello
I have not translated your article, I adapted it for french beginners. I realized in doing that I did once everything wrong. I have read many tutorials on Subversion to learn how to do things correctly.
Thus, the only improvement that I see to do now to install WordPress as indicated in the Core Handbook.
Make WordPress Core: Installing Via SVN
Here is my adaptation of your article: Organiser l’installation de WordPress pour développer un plugin avec Subversion (SVN)
I talk about in the french forum of WordPress here: Organiser l’installation de WordPress pour développer avec Subversion
Cool – thanks Luciole!
Hi
I am planning to contribute new WordPress child theme to WordPress community and looking to offer regular support to it. But i have some questions in mind. Please help me to get rid of those.
What are the key point i need to remember before uploading Child theme?
How can i manage the theme versions and updates?
Can i able to provide support via WordPress support forum?
Expecting your reply
With regards
Selvam.S
Most of the time, people contribute themes rather than Child Themes to the repository, and I’d recommend doing that. Child Themes are meant to be ways to customize existing themes rather than as stand-alone products as they are dependent on pre-existing code.
This is all taken care of via source control using Subversion and tagging.
When you upload a theme to the free themes directory, you’re setup with your own support forum channel so that you can offer support for it.
Hope this helps!
Hey tom
Thanks for you answers, I am new to WordPress community (But not to WordPress :D)
My plan is instead of creating new theme (minimum will took around 2 weeks), i prefer child theme to optimize and enhance the existing theme features such as newsletter subscription form, disqus & facebook comments, google analytics support, social share icons, advertisement management and such a similar features.
Most of the free themes does not shipped with above features and users are installing standalone plugins for all of above features and finally page loading time end up with too long.
Instead of that i will add all above features via child theme and helps WordPress community (especially beginners) to avoid installing bunch of plugins to avail all above specified much needed functionalities for WordPress powered sites and blogs.
Hope you might agree with my perspective and share your ideas and tell me why i don’t want to do it.
Generally speaking, I disagree with this approach because what you’re talking about is plugin territory. Not theme territory.
I’ve written about this in more detail in this post.
In short, functionality should be left to plugins; presentation should be left to themes. Additionally, when people are to download your child themes, they have to download the base theme as well and then you’re responsible for making sure that your child theme in compatible with every change that’s introduced into its base theme.
Thanks for sharing your views.
Still there are various child themes available in the WordPress repository.
https://wordpress.org/themes/oberon/
https://wordpress.org/themes/accountantlaw/
https://wordpress.org/themes/quality-orange/
https://wordpress.org/themes/statement/