Admittedly, the last post in this series was quite long. However, that’s not going to be how the overall series of posts articles are going to go.

Preparing a development environment is arguably one of the largest steps required, thus the need for having a lengthy, detailed guide for how to do it.

Remember that WordPress is a database-backed PHP-based web application.

This is all jargon for basically saying that it’s an application primarily written in PHP that needs a database to store its information.

As of the last post, we have the web server and PHP installed and set up, but we’re still missing the database. Luckily, the last post laid the foundation for what we need to get the database installed, set up, and ready for a local WordPress installation.
Independent WordPress Developer: MySQL Version

In addition to covering how to do that, though, I’m also going to outline tools that I find immensely useful when it comes to working with databases on your local machine.

Recall, though, that this series of articles is not meant to be theoretical, but practical. Furthermore, it’s meant to get you from having nothing to having everything you need to build high-quality, WordPress-based products in as little time as possible.

It just so happens that a lot of this time is spent getting the local development environment set up.

With that said, let’s continue and focus on what’s required to get the database set up and with how we can interact with the database server to begin creating what we need for our local WordPress installation.

[restrict paid=”true”]

Databases and Tools

There are a variety of database servers that are available on the market today, but we’re going to be using MySQL. It’s arguably the most widely adopted, and it’s well-supported via both Homebrew and Valet each of which was discussed in the previous post.

So, as promised, this article is going to be significantly shorter than the previous. That doesn’t mean, though, that there’s not substantial content to cover. Simply put, we’ll aim to do it in a much more concise manner.

And so this article requires two steps:

  1. Installing MySQL
  2. Database and Tools for working with the database server
  3. Logging into the database

With that said, let’s get started.

1. Installing MySQL

There are a variety of ways to define a database server, but for this article let’s define it as Wikipedia does:

A database server is a server which houses a database application that provides database services to other computer programs

It’s simple, straightforward, and make sense, right? MySQL is a database server that is popular not only among independent developers but also large organizations as well. It’s also widely supported across a variety of web hosts which is important especially when developing products on WordPress.

Luckily, since we’ve taken steps to install Homebrew and Valet, installing MySQL is quite easy. You’ll need to use your terminal to do this. Once open, run the following command:

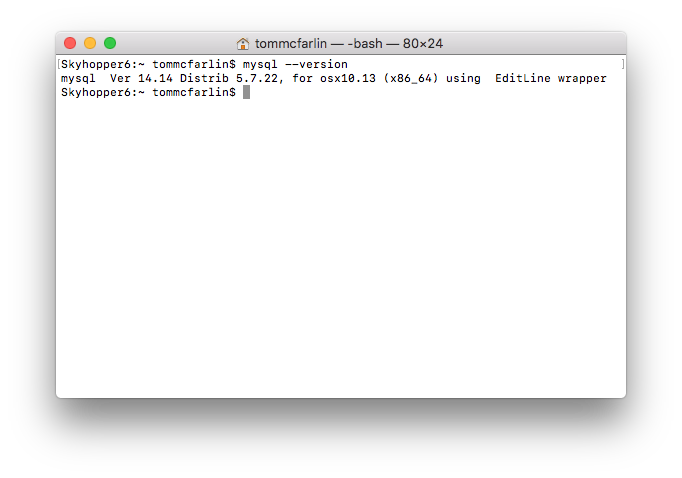
After it’s complete, you can run this command:

And you should see something like this:

Independent WordPress Developer: MySQL Version

That’s it! MySQL is installed and ready for you to create the necessary database for your WordPress project.

And to be clear: It’s worth noting that a database server houses databases and databases house tables. We’ll talk more about this in a future post, but keep that in mind you continue to move forward with the rest of this content.

2. Installing Sequel Pro (With a Word About PhpMyAdmin)

Before talking about the various tools available for browsing your database, it’s important to define what a database front-end is. There are some lengthy definitions (in this case, Wikipedia has one of them that I still urge you to read), but the purpose of this article (and future articles) we’ll leave it at this:

A database front-end is a piece of software that allows us to visually see and manipulate data either through direct queries or through features of the interface.

In other words, it’s a program that allows us to do all the things we can do from the terminal but in a much more elegant fashion.

Based on the title of this particular section, it’s evident that I’m a fan of Sequel Pro.

Independent WordPress Developer: Sequel Pro

I’ve been using it for years, and because of it being a native macOS application (versus one that ones in a web browser), I find that it’s speed, user interface, and ease-of-use to be top notch.

If you’re looking for something that’s cross-platform and that runs within the context of a web browser, I also recommend PhpMyAdmin. It’s been around for a very long time, so it’s tried-and-true, and it’s available across many hosts.

Independent WordPress Developer: PhpMyAdmin

To install it, however, will require that you review the notes on how to install it on your local machine and that’s outside the scope of what this series of articles is looking to achieve.

3. Logging Into The Database

Once you’ve got the product installed, logging into it is quite easy especially in a Valet-based setup. The credentials are:

  • Host: 127.0.0.1
  • Username: root
  • Password: [empty]
  • Database: [optional]
  • Port: 3306 (or the default)

You don’t need to worry about anything fancy like sockets or SSH or anything like that. A standard connection is all you need (regardless of the utility that you’re using):

Independent WordPress Developer: Database Login

And with that, you’ll be able to access all of the databases on your system. If this is your first foray into databases, then you’ll not have any databases from which to choose.

If for whatever reason, you already have other databases running on your system (especially if you’ve previously installed WordPress), then you’ll see them here.

But we’ll talk more about that in a future post.

And Now, Installing WordPress

Next, it’s time to get WordPress installed. It’s extremely easy, so if you’ve come this far, I’d state with confidence that the toughest part is over.

[/restrict]

Finally, this is, of course, the last piece of software required to get you up and running with developing things on top of WordPress (your IDE and tools not-with-standing).