Okay, so after talking through all of the various libraries that can help improve the code quality of your work, it still raises a question:
How do we get these projects working against our code base?
In short, it requires Composer. If you’ve never used it, I’ve written briefly about it before, but I intend to provide the basics of what you need to get started using it and the aforementioned libraries in your work.
In both this post and the next, I’ll share how to set up everything locally in the most basic form and then how it integrates with Git so you can start using it in your day-to-day.
Configuring Composer for WordPress
There’s a lot of information that can (and I’d argue should go into a file for Composer). This includes things such as the author information, PSR, information, etc. But that’s really beyond the scope of this post. Instead, I want to share the bare minimum necessary on how to get this information setup and configured.
A Sample Directory
Assume, for a moment you’re about to begin work on a plugin or something related to WordPress that will require the various libraries discussed in the previous series. And when setting up the directory for this, you’re going to have very few files. May a couple of empty PHP files, assets, etc. Perhaps it will look like this:
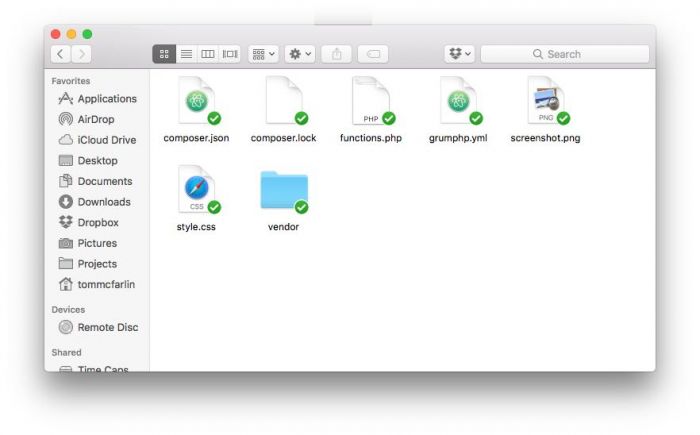
Granted, the above example is already a little ahead of what your work may look like because:
- There is a
composer.lockfile showing that Composer has been executed, - It has a
vendordirectory which shows libraries have been installed via Composer, - There is a
grumphp.ymlfile that defines how GrumPHP should work (and I’ll cover this later) when sniffing code.
But the gist of the above is the same: You have composer.json and it defines and includes everything that we need based on the previous post. So how do we set it up?
Setting Up Composer
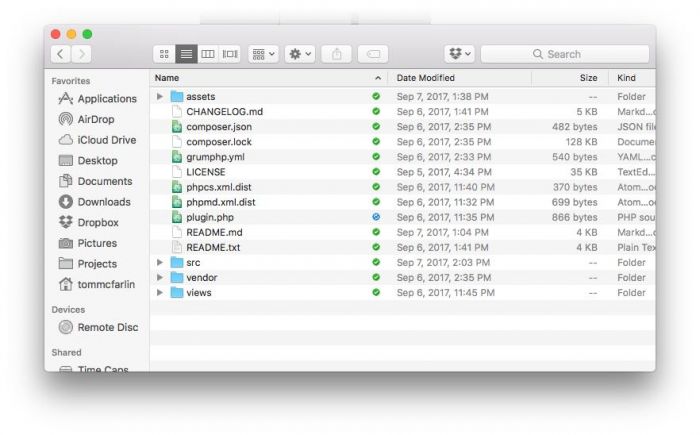
First, you need to have an idea as to how you’re going to be structuring your plugin. For example, I have a plugin setup like this:
- All PHP files reside in the
srcdirectory, - All CSS, JavaScript, images, etc., files are in the
assetsdirectory, - The
vendordirectory is for things that are installed via Composer, viewsis what’s used in the front-end of the project.
For example:
Second, in the directory in question, you’ll want to create a file called composer.json. This can be done via Terminal by just issuing a touch command, or you can create it in your IDE.
The important thing to take away from this is that there is a src directory because that’s the directory that includes our PHP files and that’s the directory we want to have sniffed.
A Basic Composer File
With that said, here’s a basic composer.json file that you can use in your projects based on the previous series and based on what’s shared below:
Looking at the file above, here’s how to parse it:
- Lines 2 and 3 give a bit of a description of what the plugin is all about. That are also other areas in this file to give more information about what needs to be done.
- Lines 4 to 8 are important because they explain that we’re using PSR-4 for autoloading and that all files fall under the top-level namespace of
Presswareand that the PHP files are in thesrcdirectory. - Lines 9 – 18 cover all of the files that covered in the previous series.
Next, issue the following command in your terminal:
$ composer install
And that will install these packages.
What About Commits?
To make sure that you’re properly snuffing and handling commits, it’s important that you configure GrumPHP so that it’s watching the files. But I’ll take a look at that in the next post.
In the meantime, perhaps this is a good opportunity to setup a demo plugin and practice with the above code. Getting it set up just right the first time can be tough. Luckily, many of the output errors are really easy to understand, so it’s relatively straightforward to resolve them.