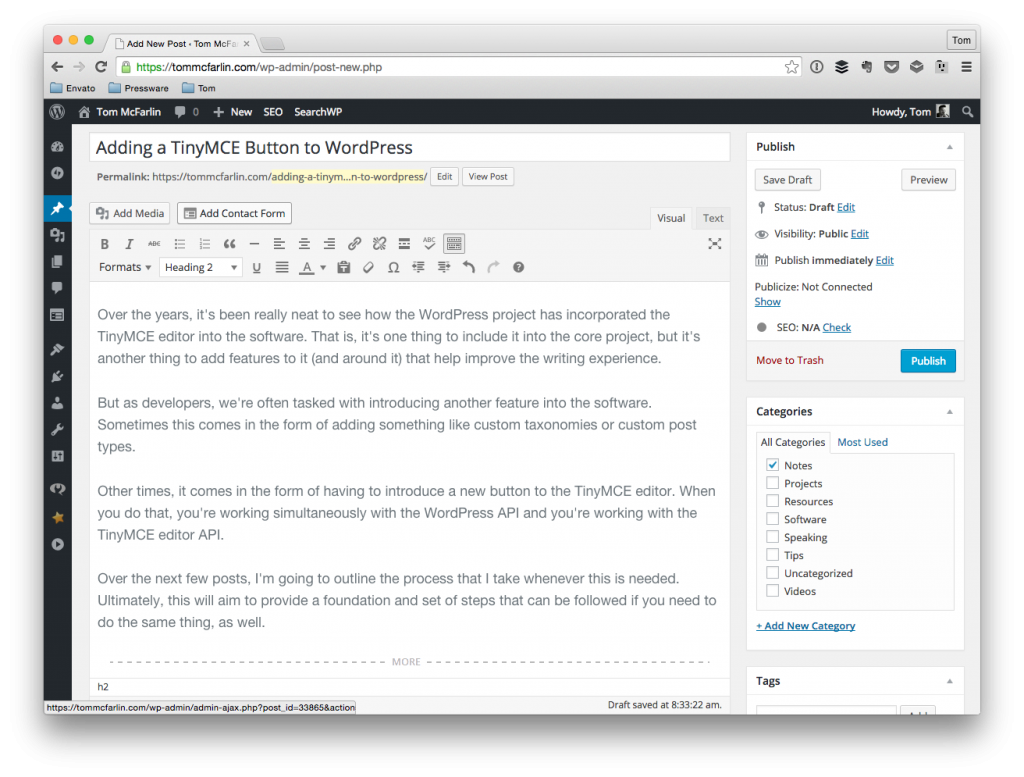
Over the years, it’s been really neat to see how the WordPress project has incorporated the TinyMCE editor into the software. That is, it’s one thing to include it into the core project, but it’s another thing to add features to it (and around it) that help improve the writing experience.

My very own copy TinyMCE Editor. So spectacular.
But as developers, we’re often tasked with introducing another feature into the software. Sometimes this comes in the form of adding something like custom taxonomies or custom post types.
Other times, it comes in the form of having to introduce a new button to the TinyMCE editor. When you do that, you’re working simultaneously with the WordPress API and you’re working with the TinyMCE editor API.
Over the next few posts, I’m going to outline the process that I take whenever this is needed. Ultimately, this will aim to provide a foundation and set of steps that can be followed if you need to do the same thing, as well.
TinyMCE Buttons and WordPress
As previously mentioned, when adding a new button, you’re going to need to work with both the WordPress APIs – such as using a couple of filters and hooks – and you’re going to need to work with the TinyMCE API (which has its own documentation) in order to introduce the button and integrate it into WordPress.
Throughout this series of posts, I’ll show you how I typically go about doing this. Note that I use an object-oriented approach to building my plugins so this may not jive with with your particular style of writing code, but the gist of how to do it is still there.
Plus, I’m planning on starting small and gradually integrating more as the series moves forward. But enough chatting about what I’m going to do.
Let’s look at some source code.
1. Define Your Project’s Organization
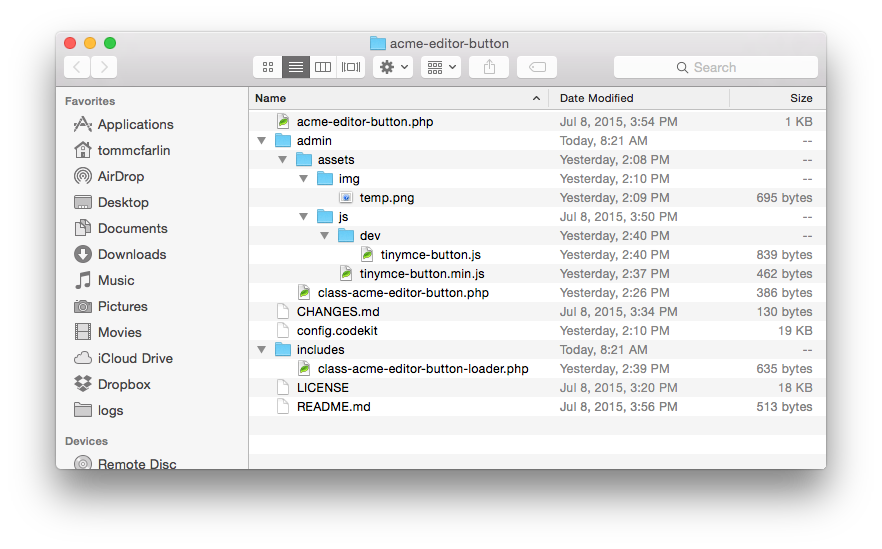
This step should be pretty self-explanatory. How you opt to organize your code is your business. How I’ve opted to do so is below:

Here’s a short description of what each file in the directory does:
- `acme-editor-button.php` is the plugin file that bootstraps the entire plugin and sets everything into motion
- `admin` is a directory that includes all files relevant to what will appear throughout the dashboard as the plugin is under development
- `admin/assets` includes all of the assets needed to power the plugin
- `admin/assets/img` has the image (or images) that will be used to add a button to the TinyMCE editor in WordPress
- `admin/assets/js` includes the JavaScript file used to bring life to the actual button on the editor. The `dev` directory includes the raw development file and the root of the directory includes a minified, linted version of the file that’s been generated by CodeKit
- `CHANGES.md` is the changelog
- `config.codekit` is the file that’s created by CodeKit to store its configuration settings
- `includes` has all of the files necessary to help power the plugin. In this class, it just includes a `Loader` class that’s sole responsibility is to handle actions and filters.
- `LICENSE` is a copy of the GPL
- `README.md` is a copy of the instructions for how to use the plugin
Straightforward stuff. Some of the files are more populated right now than others, some will grow over time, and some will be added as we continue to build out the plugin.
2. Stub Out the TinyMCE JavaScript
In order to add a new button to the editor in WordPress, the TinyMCE editor must be leveraged. To do this, we must include a JavaScript file that interfaces with the necessary parts of TinyMCE’s API.
The initial file should look something like this:
However when it comes to actually enqueuing this file with WordPress, we don’t use the standard admin_enqueue_scripts hook. Instead, we use a different set of filters.
3. Including The JavaScript
If you’re not familiar with object-oriented programming, this part can be a little bit confusing so I’m only going to talk about the hooks that are necessary to register the button.
In a follow up post, I’ll go into more detail as to how to organize the classes to these hooks are contained in the proper classes, and said classes communicate with one another.
First, you need to two define two hooks (which means that you’ll need to define two filters):
- `mce_external_plugins`
- `mce_buttons`
For the first hook, the definition and corresponding function will look something like this:
This is where we’re adding a button to the editor. Notice that we’re working with the array that’s passed into the function and we’re adding the JavaScript that we defined earlier in the post.
For the second hook, you’ll need to register button. The definition for this hook and the corresponding hook will look about like this:
Notice that this function accepts an array of buttons into which we can push our own. The name that we’ve selected in this particular step should correspond to what’s used throughout the JavaScript.
Remember to return the updated array.
Up Next
In the next post, we’ll look at how the above functions fit into the context of a single class. From there, we’ll then look at how other plugin classes can communicate with said class and we can actually make the TinyMCE button in WordPress do something useful for us.


Leave a Reply
You must be logged in to post a comment.