As we continue looking at what it means to be an independent WordPress developer, the tools needed, and the various strategies that can improve our skillset, I’ve been talking through the various constants, plugins, and tools to help us.
If you’re just stumbling across this post, then I recommend checking out my guide to native WordPress debugging tools as well as the rest of the posts in the series thus far.
After all, I find it important that we’re all working off of the same foundation – or something closely related – when going through this information.

Ultimately, using a tool like Xdebug is indispensible, but we have to work up to that (for those who are curious, I wrote a brief guide about this a little over a year ago).
For now though, let’s start with the basics. In the previous post, I left with the following statement:
In the next post, we’ll start looking at what’s necessary to examine the error log that’s generated by WordPress and how to understand the information we see.
And that’s what I want to look at today because, if nothing else, it will give you something practical off of which to work.
Understanding WordPress Error Logs, Part 1
Before going too far into this, I do want to address one question that’s been raised from a member of the site.
Namely, I was asked:
When are we going to look at object-oriented principles?
Though I’ve covered a bit about this in a previous series, it’s something that I’m working to cover more in-depth later in this series.
With that said, though, let’s start looking at error logs.
[restrict paid=”true”]
Configuring Your Constants
If you’ve not configured the constants in your wp-config.php file, I recommend doing so now as this will give you the greatest level of granuality when examining any issues that may arise.
If you’ve not caught up, be sure to read this post (and if you have, make sure the following constants are defined in your configuration file):
Once those are in place, then you have everything you need to not only see information on the screen, but also in the debug log that WordPress will generate.
Where Is the Log?
Depending on the nature of your environment, this may vary; however, in most cases, you’re going to find debug.log in the wp-content directory sitting above the plugins, themes, and uploads directories.
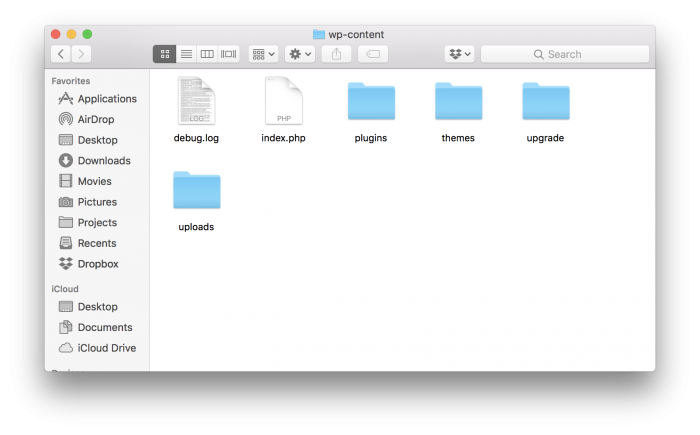
As you can see from the preview of the screenshot above, my debug file has a lot of content in it. We’ll take a look at that more in-depth in the next section as well as how to understand it. In the meantime, though, check to see if this file even exists.If it does then feel free to go ahead and peruse the content of the file. You may or may not understand much of what’s going on, but the content in the file means something in a theme or plugin is triggering various PHP warnings, notices, and errors that WordPress is catching and dumping to the log file.
What’s the Log File Even Mean?
This doesn’t necessarily mean that something is broken, but it indicates that something isn’t performing as it should, isn’t being properly caught and handled at the programmatic level, or is simply doing something it shouldn’t be doing.
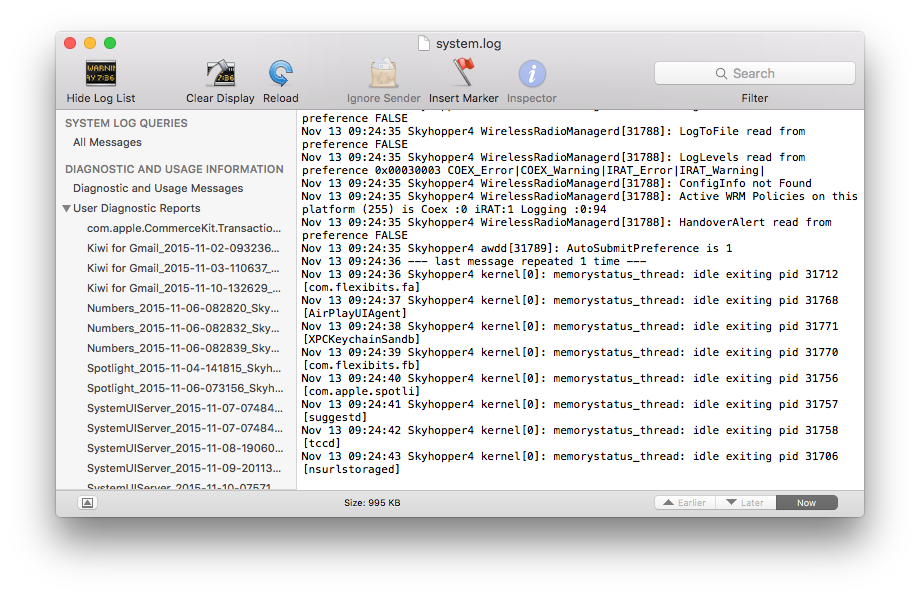
It doesn’t have to look like this (but it can!).
As developers, we should strive to make sure our code doesn’t generate anything that would be written to the error log.
It’s one thing to do it in development as we’re able to gain insight on what it is that we’re doing and how WordPress is performing. It’s another thing, though, for something that we release at the production-level to generate such things.
Reading the Error Log
Obviously, there’s more to reading the error log rather than just opening it up. For many, the initial impression is that it can be a bunch of jargon. I understand that, too. But when you understand what it’s showing you, it’s far easier to understand.
So let’s take a look at a really simple example. This isn’t a contrived example, either. In fact, this is one that’s come from a plugin that I was working on. The error log contains the following information:
Notice that, in the above gist, there are three lines. The best course of action when reading error logs is to start at the bottom and work your way up. This is because things when running in execution, operate on a stack.
A Short Digression on Stacks
I won’t go into the computer science definition of the term, but the code is executed and works in such a way that functions occur and quite literally, in the memory of a computer, stack on top of one another.
Thus, the most recent thing to run is always going to be at the top where the root of where it starts is at the bottom. Since we’re writing code on a pre-existing application, that is WordPress; then our code is likely to always be at the top.

Understanding WordPress Error Logs: It’s Not This Kind of Stack
The idea is that code will begin executing in WordPress and work its way up to the work that we’re doing. When there’s a notice, a warning, or an error, it’s usually going to be something in our code (though WordPress isn’t exempt, that’s generally the case).
So when you read through the error log, you’re, in essence, reading through what’s called a stack trace. Wikipedia, as linked, has a pretty in-depth definition on the topic, but perhaps the most relevant bit to this post is as follows:
Programmers commonly use stack tracing during interactive and post-mortem debugging. End-users may see a stack trace displayed as part of an error message, which the user can then report to a programmer.
This jives with what I’ve outlined above, right? But enough talking about what a stack trace is (become it will become clearer as we get deeper into debugging), let’s get back to reading the log file as it currently stands.
Back to Reading the Log
Including Files
First, let’s look at the bottom line in the gist above. It contains the following:
[05-Jul-2018 19:44:03 UTC] PHP Warning: include_once(): Failed opening './src/Admin/EmailExportSubmenu.php' for inclusion (include_path='.:/usr/local/Cellar/php/7.2.5/share/php/pear') in /Users/tommcfarlin/Dropbox/Projects/trunk/wp-content/plugins/easy-email-export/easy-email-export.php on line 25
This is telling me that on line 25 of my file, easy-email-export.php, that it failed to open a file for inclusion. This means I have an include_once statement in the code that’s referencing ./src/Admin/EmailExportSubmenu.php that it cannot find.
So the best course of action would be to find line 25 and determine why it’s not locating the file. Perhaps that’s dumping out the full path as to where it’s looking. We’ll get to this momentarily when talking about writing to the error log.
Making Sense of the Errors
On the next line (that is, the line above the one we’ve just looked at) contains the following:
[05-Jul-2018 19:44:03 UTC] PHP Warning: include_once(./src/Admin/EmailExportSubmenu.php): failed to open stream: No such file or directory in /Users/tommcfarlin/Dropbox/Projects/trunk/wp-content/plugins/easy-email-export/easy-email-export.php on line 25
This particular line differs only slightly but it gives additional insight and that’s contained in the clause that reads “No such file or directory.” This is insightful because it’s literally telling us that the file doesn’t exist.
At least, it doesn’t exist where it’s looking. So the two possibilities are:
- we haven’t created the file we’re references,
- we’re referencing the location of the file in the wrong place
Thus, the first thing we would need to check is if the file exists in the location we’re trying to include. If it doesn’t, then we should create the file.
If the file does exist, then we know that the plugin is looking to load it from the wrong path. So we may need to look at our autoloader, our path of inclusion, or however the files are being retrieved. Because, odds are, if the file exists, then it’s trying to be loaded from a place that it doesn’t reside.
An Uncaught Error
In the final line of the code, you’ll see something like this:
[05-Jul-2018 19:43:53 UTC] PHP Fatal error: Uncaught Error: Class 'EasyEmailExport\Admin\EmailExportSubmenu' not found in /Users/tommcfarlin/Dropbox/Projects/trunk/wp-content/plugins/easy-email-export/easy-email-export.php:37

#8 /U in /Users/tommcfarlin/Dropbox/Projects/trunk/wp-content/plugins/easy-email-export/easy-email-export.php on line 37
This is a good example, first, because it explicitly declares that this is an uncaught error. This means that the whatever the functionality, something is throwing an error and it’s not being caught.
- this could be an exception,
- this could be a problem in trying to call a function that doesn’t exist,
- this could be operating on a variable that isn’t defined,
- and so on.
Ultimately, there’s a plethora of problems that could be present. The good news, in this example, is that it’s practically the same as what’s above: A file isn’t found.
Except, rather than throwing a warning, PHP explicitly tails us this is a fatal error and the program cannot continue execution until this line of code is resolved. Before dismissing this as something that’s the same as the previous section (because, in a manner of speaking, it is), we need to recognize that this is explicitly stated as a fatal error whereas, in the previous example, it was treated as a warning.
There are different ways to conceptualize this but the way I generally think about it is this:
- A notice tells me something is off in the code, but it’s not bad enough to warrant halting execution.
- A warning is slightly more serious because it means that something is in danger of not working.
- An error straight up says “this doesn’t work and the program cannot proceed.”
Now we know the problem is show-stopping, so to speak, and we know what the problem is. Simply put, a file that’s required for the program to complete it’s execution isn’t found and thus the program stops operating.
That’s certainly a fatal error.
What’s the Solution?
What I provide as the solution to my problem isn’t going to be prescriptive as to what will work for you. For me, it was a matter of a line in my Composer configuration such that the Composer autoloader could not locate the file in the proper location (but this has more to do with file organization, namespacing, and so on).
For you, it may be something different.
- maybe it’s looking for a file in the wrong directory,
- maybe the file is named something different than what’s specified in code,
- or maybe it’s something else.
Whatever the case, the point is that it’s a matter of working your way through the log file from the bottom to top to diagnose the problem and trace what PHP, WordPress, and your work is doing and then diagnosing it from there.
[/restrict]
Writing to the Error Log
In the next post, we’re going to take a moment to see how we can write to the error log. Sometimes, reading the file is fine and simply going back and forth between what we’re seeing and resolving the problems is nice.
But what about the case of when we want to dump something out to gain insight on what WordPress or PHP is seeing? That’s also useful.
So in the next part of this series on understanding WordPress error logs, we’ll do exactly that.
What’s After That?
Next, we’ll look at how to use some of the plugins previously outlined to test code and to also profile our code to make sure we’ve done everything we can to ensure we’re producing a level of quality.
This doesn’t mean that we’re completely done with the debugging process, but we’re definitely a step closer, and we’re positioned to write code with a degree of quality that doesn’t result in a file representing various nuanced problems we were too careless to fix (let alone understand).