A couple of weeks ago, I worked through a series of posts on how to write a TinyMCE plugin for the WordPress editor (since the WordPress Editor is TinyMCE).
In a recent project, one of the things that I needed to a build was a feature that allowed users to highlight text such that they would select the text in the editor (you know, with their mouse), click on a “Highlight Text” button in the toolbar, then have the text highlight.
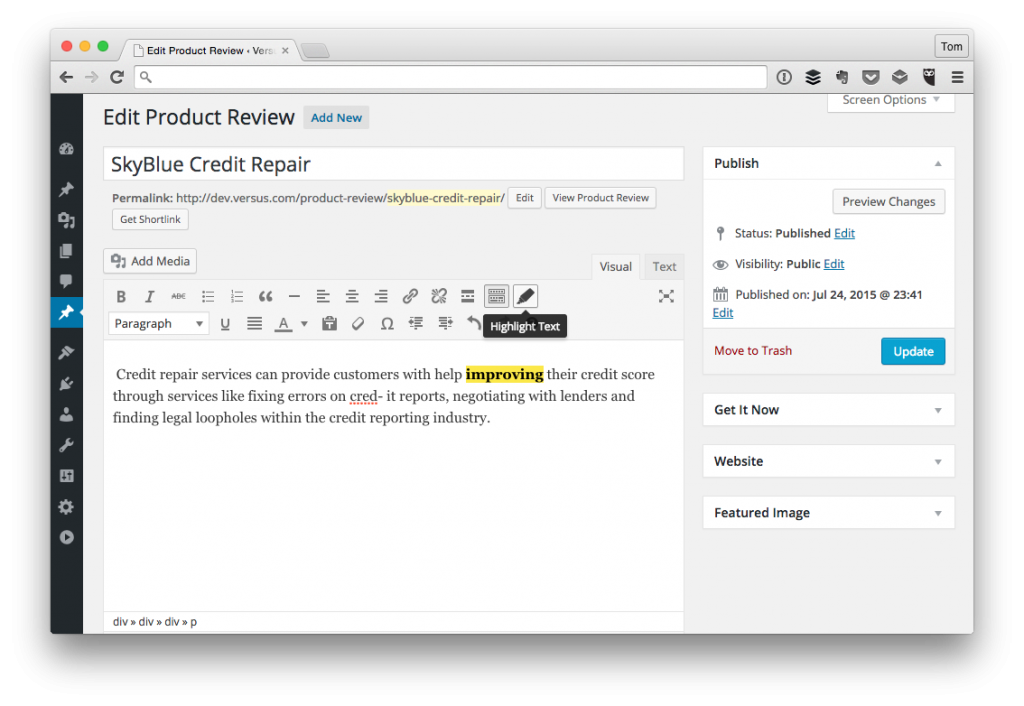
And, naturally, it would return to its normal state of being un-highlighted if the text is selected and then the toolbar button is clicked again.
Though there’s no reason to share how the plugin is built in its entirety, I thought I’d walk through how I added the new command to the toolbar and used the HTML5 mark tag to include this functionality.
A TinyMCE Plugin To Highlight Text
First, I think it’s always helpful to break down the functionality that’s necessary for a given feature (let alone an entire project). In short, the feature needed to do the following:
- Introduce a button that will wrap the selected text in the `mark` tag
- Mark sure to remove the `mark` tag if the selected text is already highlighted
- Style the front-end code, if necessary, to match the color scheme of the theme
Only three things, so nothing too terribly complicated (famous last words, right?). Before we go any further, I’m assuming that you’re familiar with the series on writing TinyMCE plugins as I’m going to be using some of that code in this post.
Add The Button
Assuming that you’ve setup the proper server-side code for the WordPress hooks, the following JavaScript is what you need in order to add a button to the TinyMCE editor.
This button will be used to highlight text. Notice that the path to the image that will be used for the button is based on my own environment so your implementation will vary.
Add The Command
Think of the command as the code that fires whenever you click the button. The command can be as simple or as complex as you want. In this case, it’s going to need to do two things:
- Highlight the selected text,
- Or un-highlight the selected text.
Nothing that a conditional can’t take care of, right? Remember though, we want to wrap the text in the mark tag to denote that it is, in fact, highlighted.
Here’s how we can wrap the text with the mark tag:
And here’s how we can expand this code to handle the case to detect if it’s already highlighted:
And that’s the basic command.
Style The Front-End
This is an optional step but if you’re building a theme that’s going to support this option, odds are it has it’s own color scheme.
To that end, you’re going to want to add an editor-style.css file to your theme as well as add the same code to the style.css file (or whatever file you’re using in order to style your theme).
All of this is documented well in the Codex so I’m not going to reiterate most of that here. Just remember then when you are including an editor-style.css that you don’t use the usual wp_enqueue_style but you use the proper hook:
Other than that, you should be good go.
A Niche Case?
Maybe this is somewhat of a niche case. I don’t know.
But if not, then hopefully it helps to show how you can go about adding more advanced functionality to the TinyMCE editor than what I covered in the recent series.
Leave a Reply
You must be logged in to post a comment.