If you’re around my age or have been in the industry since the early 2000s, you likely think of the phrase “clean code” being synonymous with the book by the same name written by Uncle Bob (or Robert Martin).
From the description of the book:
[Robert Martin] has teamed up with his colleagues from Object Mentor to distill their best agile practice of cleaning code “on the fly” into a book that will instill within you the values of software craftsman, and make you a better programmer―but only if you work at it.
Clean Code Description
There’s a long history behind what Uncle Bob was trying to do with the software craftsmanship movement (and I don’t think his ideas were bad, for whatever it’s worth). And this book, along with a few others, helped to foster large swaths of developers to begin implementing certain practices in their day-to-day work.
This book, the author, and what it espouses is not without criticism and it seemed to get stronger the longer the book has been out. But regardless of how many practices are taught in a book – or lecture or podcast or presentation – there is always at least something to take away from it.
And though there are plenty of things in Clean Code that are tough to put into practice or aren’t always feasible to do so, that doesn’t mean some of it can’t be done.
This doesn’t refute or support the statement in the original article though, does it? Specifically, said article claims: “Nobody gives a f*** about your clean code.”
Is that true?
Who Cares About Clean Code?
A Little Bit of History (or “Back in the day…”)
When I started my first job out of college, we were used a tool called BitKeeper for version control. It’s since been discontinued. Here’s the thing about BitKeeper though: It was only for committing code. There were no other associated tools like we’ve come to expect with GitHub (such as PRs, issues, project management, wikis, etc.).
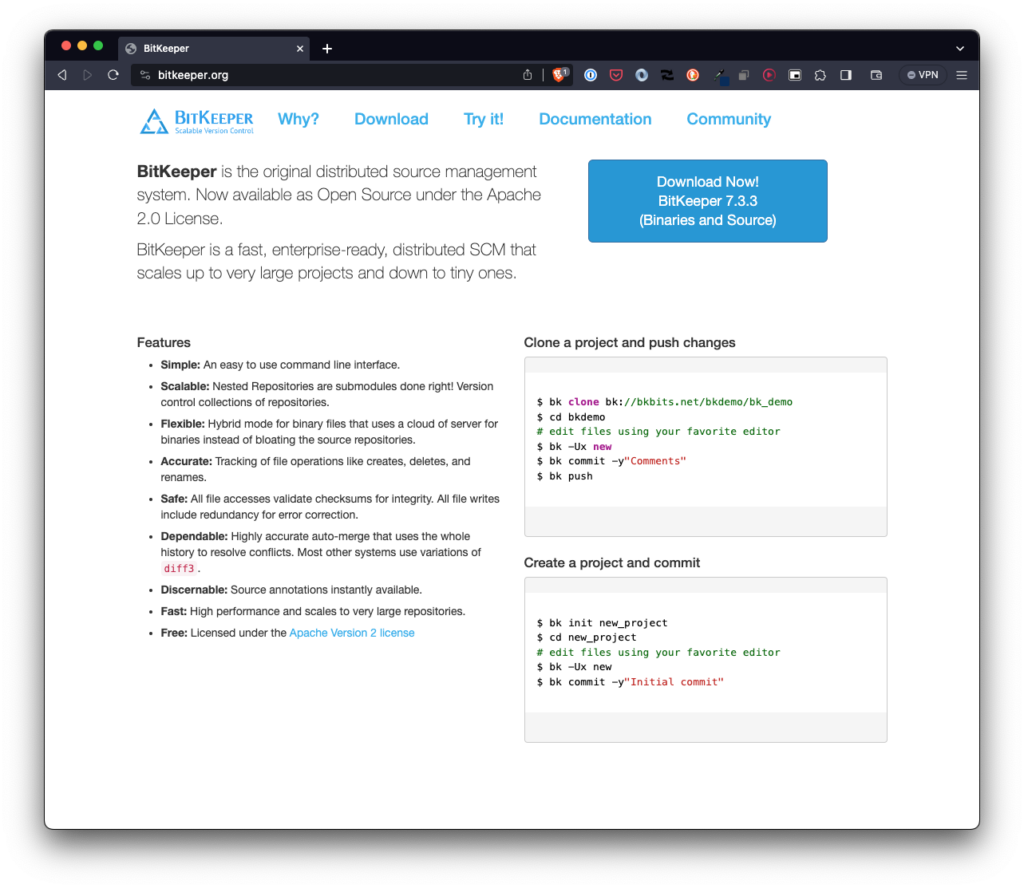
This meant that all code reviews – even if we were pair programming on a project – requested code reviews via email. So before we committed any code that would go out to staging, it needed to be reviewed by a team (of approximately seven people – they were small teams :) and it had to be done via email.
The idea of doing code reviews via email seems silly now, but that’s how it was done. Regardless, the point is we were still doing code reviews.
And this is where the concept of clean code is relevant.
At some level, it was always expected that we would be writing readable code. This isn’t necessarily the same as clean code because readable code can include a function that’s dozens of lines long and does more than one thing, but it gets the work done (whatever the work may be).
If the project allowed for it, then cleaner code and strong architecture was usually expected and if basic principles weren’t put in place then it would be brought up during a code review.
And this is where it’s important to ask: Does anyone care about clean code? Often times, it’s deadlines that matter (or the amount of time it takes to deliver a working solution).
A Hierarchy of What Matters in Software
Since having a working solution is what provides value to a user then whether or not it’s built following a particular paradigm or employing a set of principles that make for cleaner more maintainable code will always take a backseat.
If there’s a hierarchy of what’s often expected out of code, it’s something like this:
- It solves the problem (it works),
- It’s bug free (in so far as it’s measurable),
- It can be easily patched if a bug is caught,
- It’s commented so fellow developers know what’s happening if they have to jump into the fray to work on it,
- It follows whatever coding standard the organization implements,
- It follows the principles of Clean Code.
There are probably a lot more but the point I’m making is that the author is right: Clean code doesn’t matter as much as delivering a working solution.
If writing clean code delays shipping a solution then the natural consequence is you’re punting value for the customer over something they aren’t even aware exists.
The user doesn’t know how the codebase looks. The user just sees what features that product is offering. So don’t get overly attached to your clean and elegant code. Focus on shipping the feature on time and bug-free.
10 hard-to-swallow truths they won’t tell you about software engineer job
With all of that said, this is not an excuse not to attempt to write clean code, refactor when possible, or provide well-architected solutions.
Then How Can We Integrate Clean Code?
Whenever code is submitted for a code review, it’s likely that you’ll get feedback that is something like:
- Maybe change [this particular line] to be a bit more readable such as removing the nested ternary operator,
- Add a clause [to this function] so you’re checking to make sure something is readable or writeable before working with it,
- Consider adding a guard clause at the top of the function,
- If time allows, maybe create a base class and then subclass it so we don’t have some much duplicate functionality,
- …and so on.
There are a lot of common suggestions here – so common that these are the ones that are at the top of my mind from code reviews I’ve received (and given). But did you catch the point about creating a base class? This is one of those pieces of feedback that appeals to DRY and though it’s something that would make the architecture more maintainable, it will also delay development more than the rest.
At this point, it’s likely going to be hard to implement that unless there’s enough time in the project. The other pieces of feedback will take priority.
When it comes to employing clean code in my day-to-day, I’ve found it most effective to start adding little things in as I have the chance. It’s a lot like compound interest – over time, the value adds up.
And then when you’re used to employing the small things all along, employing more strategic decisions gets easier because you’re already training your mind to think in terms of these strategies. After a long enough time of moving in this direction, you should be able to integrate writing clean code into your workflow all the while meeting the necessary deadlines.
This doesn’t mean you’re going to be employing every principle. That’s tough. But if you can start small and make those contributions over time all the while gradually training your thinking to fall in line with the principles of clean code, then it becomes the primary way in which you’ll write code.
No, you won’t always be able to do it. No, people generally won’t care about it: they’ll know what you’ve done when they see it but don’t expect praise for it. And though you may get some feedback on how to improve the code, there likely won’t be time to do so and you’ll have to earmark the suggestion and employ it in another project.
For many, it’s more popular to talk about clean code than it is to employ it. It’s more fun to talk about code than it is to write it. And it’s more fun to ship code than it is to refactor it.
So, yeah, most people aren’t going to care about your clean code. But that doesn’t mean you shouldn’t aspire to write it. I’m 16 years into my career and still working on employing new strategies with just about every project I write. I enjoy it even if code reviews don’t care about it.
And that’s because I know, ultimately, it’s going to make me a better engineer and it’s going to make the software more maintainable over time. Sure, it takes time to get there, but such is the case with just about anything worth doing.