The WordPress Heartbeat API is not exactly a new feature. That is, it was first released in WordPress 3.6. Maybe I’ve just done a poor job of keeping up with what others are doing with the API, or maybe I’ve just not paid attention to some of the stuff that people are doing with the API, but I haven’t seen that many examples other than how to get started with it.
On top of that, the Heartbeat API codex is lacking in documentation (though this is an open source project, so if anyone’s to blame, it’s all of us), so perhaps that’s a reason that few people have begun to implement it into their projects.
Whatever the reason, I thought it may be worth showing a practical example of how I recently implemented it within a theme I’m working on, and how I’m using it within conjunction with the Theme Customizer so that when an administrator makes a change to the theme using the Theme Customizer, the visitor will automatically (or is it automagically?) see the changes.
The WordPress Heartbeat API
Before going any further, it’s important to understand the basics of the Heartbeat API so that you’re able to follow along with the code.

In short, the Heartbeat API is a mechanism built into WordPress that simulates a pulse and allows developers to hook onto the events and then make things happen.
The nice thing is that the Heartbeat API is accessible both via JavaScript and the server-side (and, thus, when in used in conjunction with one another, Ajax).
A Practical Example
So here’s the scenario in which I wanted to take advantage of the Heartbeat API:
- On the homepage of the site, visitors will have the ability to view a streaming video.
- The site administrators have the ability swap the video out for an image when the video is done.
- When the site administrator opts to toggle the video off and display the image bumper, then users page should automatically update to display the images rather than the video.
Sounds easy enough, right?
In order to understand the code, there’s are three things worth noting:
- The option that holds the value on whether or not the video or the bumper should be displayed is stored in `acme_video_embed_display`.
- The JavaScript will listen for the `heartbeat-send` event to send data to the server, and will respond to the `heartbeat-tick` event that will receive (and respond) the response from the server.
- Like the WordPress Ajax API, Heartbeat API actions can be for those who are logged in and those who are not. As such, we need to make sure we define our server-side event function accordingly.
And that’s really the crux of what we’re doing. The only other thing worth nothing is that all of this is being controlled by the Theme Customizer.

The user opts to display videos using the theme customizer.
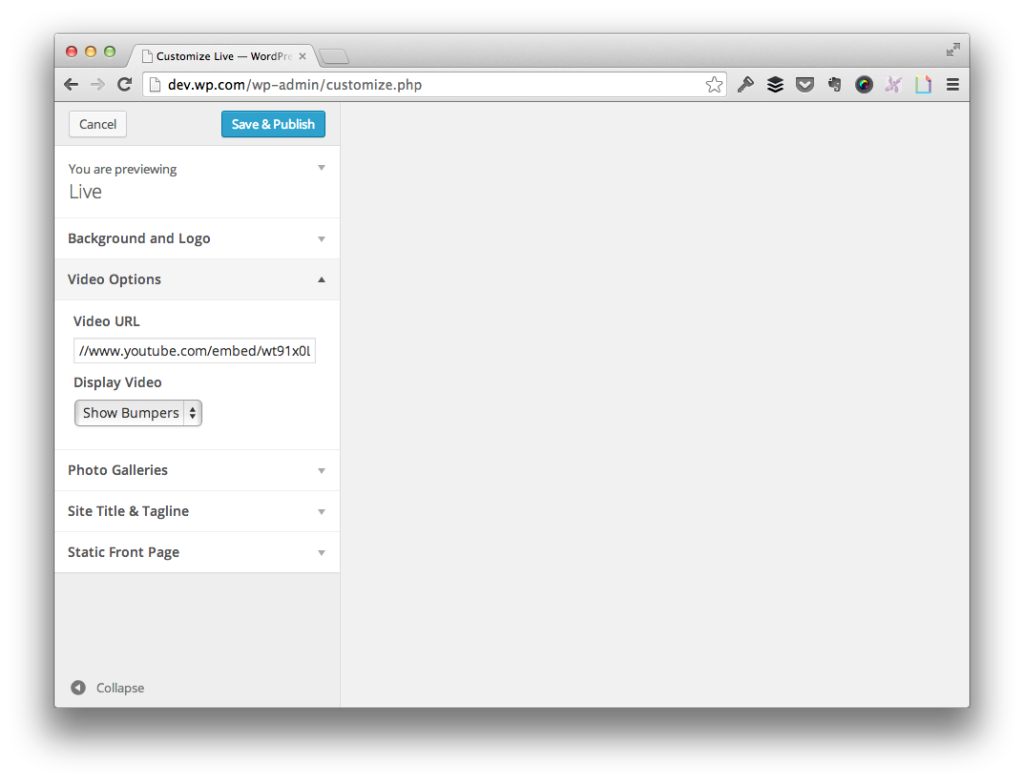
The user opts to display bumpers using the theme customizer.
So the user has two options from within the Theme Customizer:
- S/he can opt to display the video,
- S/he can opt to display bumpers.
Those are the two options that our code must handle.
The Client-Side
First, let’s wire up the JavaScript on the client-side. Obviously, your implementation will vary based on what you’re doing, but for my needs, this is how the code is structured:
- I shoot a request to the server on the `heartbeat-send` event which requests the status of the display embed type.
- I respond to the server on the `heartbeat-tick` event and then take appropriate action based on the response that I receive. In short, I hide the bumper if the video should be displayed, and vice versa.
Checkout the JavaScript in the following gist:
As I said earlier in the article, the JavaScript is responsible for working with two events. First, it sends the information to the server, then it responds to the respond from the server.
In the gist above, we can see both what’s being sent, and how it responds, but what about what’s happening on the server?
The Server-Side
When using the Heartbeat API, the server-side is responsible for examining the data in the incoming request and determining how best to respond to what is being requested.
In our case, we want to know if the video or the bumpers should be displayed. To that end, we setup a function that will look at the incoming data, create a response based on the request, and then return the response.
See how it’s done in this gist:
Notice that the conditional reads the $data array to determine if the client is requesting the acme_request_embed_type. Since that’s what we specified in the client-side JavaScript, that’s what it receives.
As such, it responds to the request by taking a look at the acme_video_embed_display option which is retrieved using get_theme_mod (since we’re using the Theme Customizer).
From there, it adds it’s response to the $response array, and then sends it back to the client (in which you can see how it handles it in the first gist).
An important thing to note here is that this function is hooked on both the _received and the _nopriv_received actions. This is because we want the feature to function for users who are both logged into the site and not logged into the site.
Any More Details?
Obviously there’s much more to the Heartbeat API than what is shared here. That is, you can change the speed at which the pulse occurs, you can change up how the client polls the server, how the server responds, and so on.
The purpose of this particular post is to show a simple, practical example – not to be a comprehensive piece of documentation on the API, but it should be enough to get you started.
Leave a Reply
You must be logged in to post a comment.